The things I create usually have a tattered, frayed, vintage-y vibe, but I wanted a clean and modern look for my current project. So let me share with you how I made these super crisp-edged applique shapes.
You’ll need the following:
Lightweight cotton or linen fabric
Lightweight fusible interfacing (I used this one)
Pen or pencil for drawing shapes
Sharp scissors
Sewing machine
Sashiko or tapestry needle
Sashiko or embroidery thread
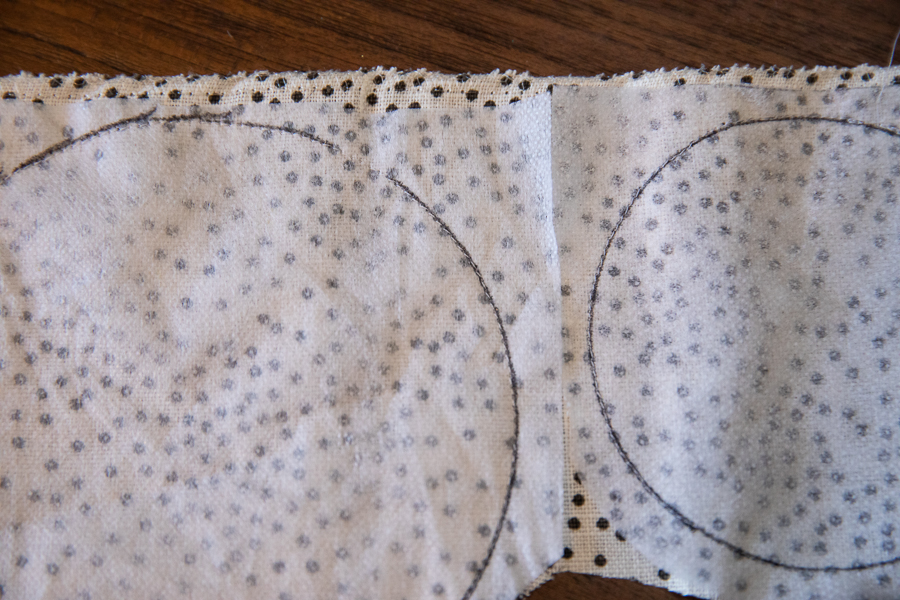
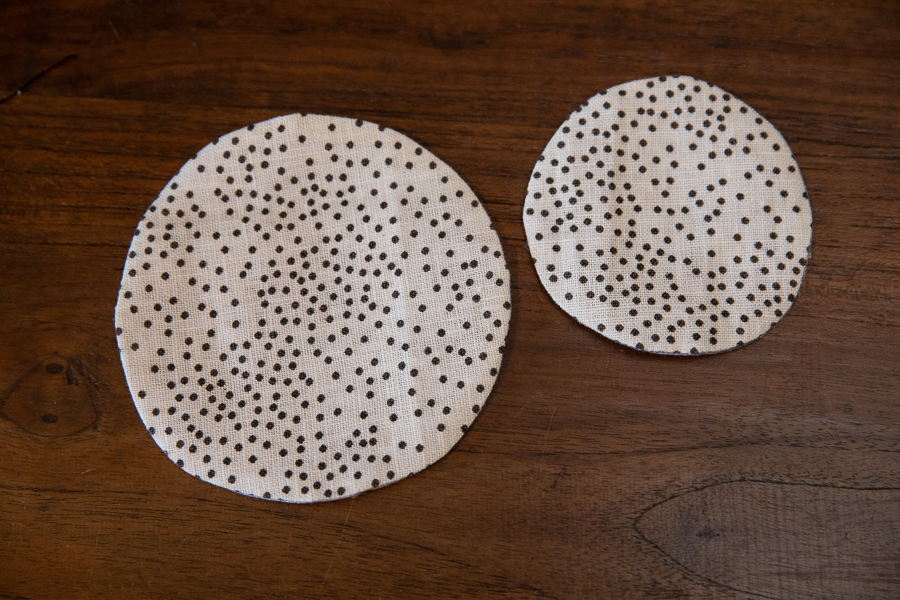
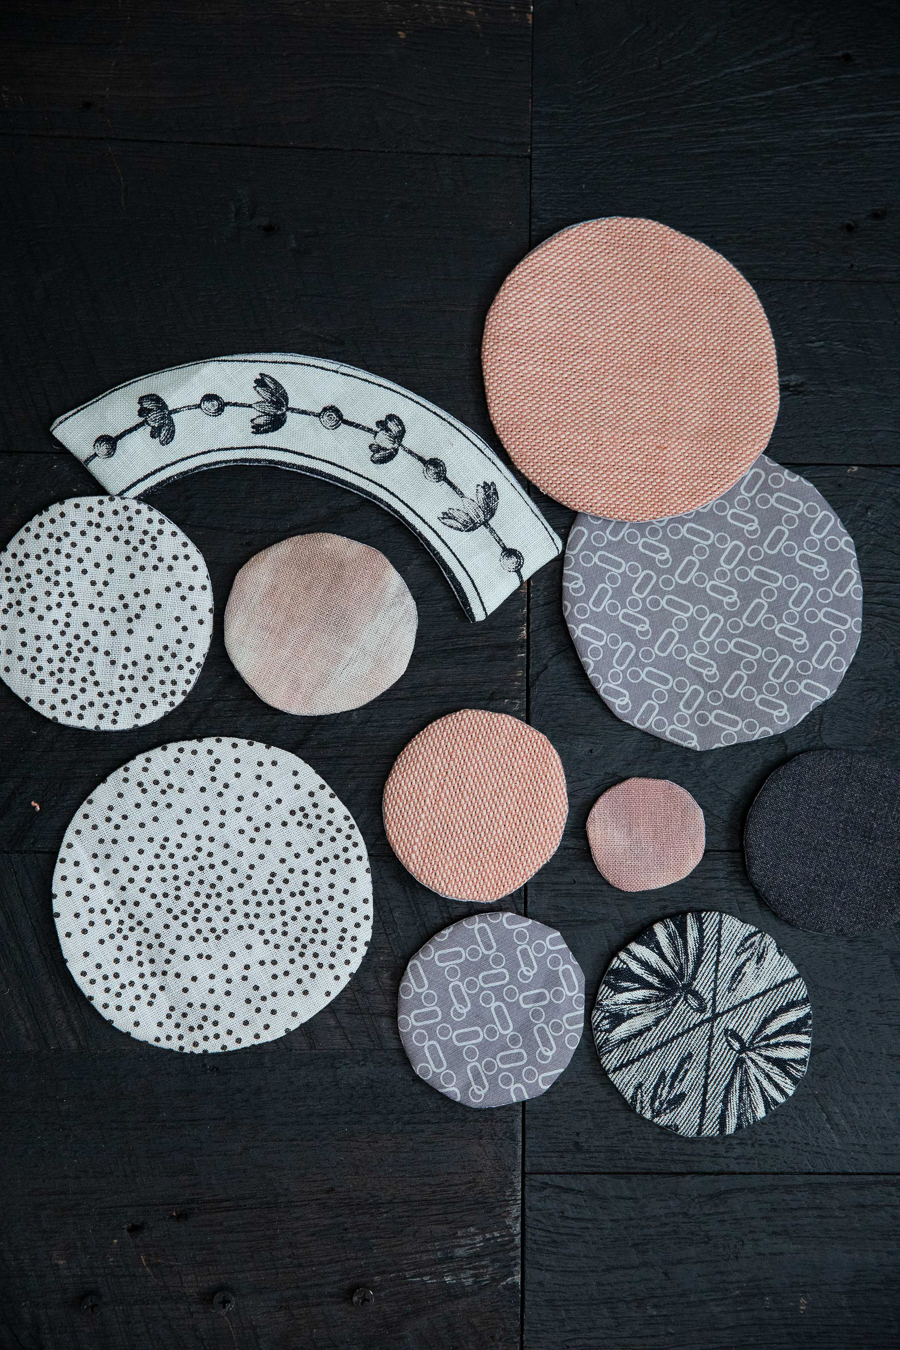
Start by drawing a design on the interfacing. Circles work really well and shapes with big flowing curves.
Place and pin the fusible side of the interfacing onto the right side of the fabric.

On the sewing machine stitch along the line. The neater you are, the better shape you will have.
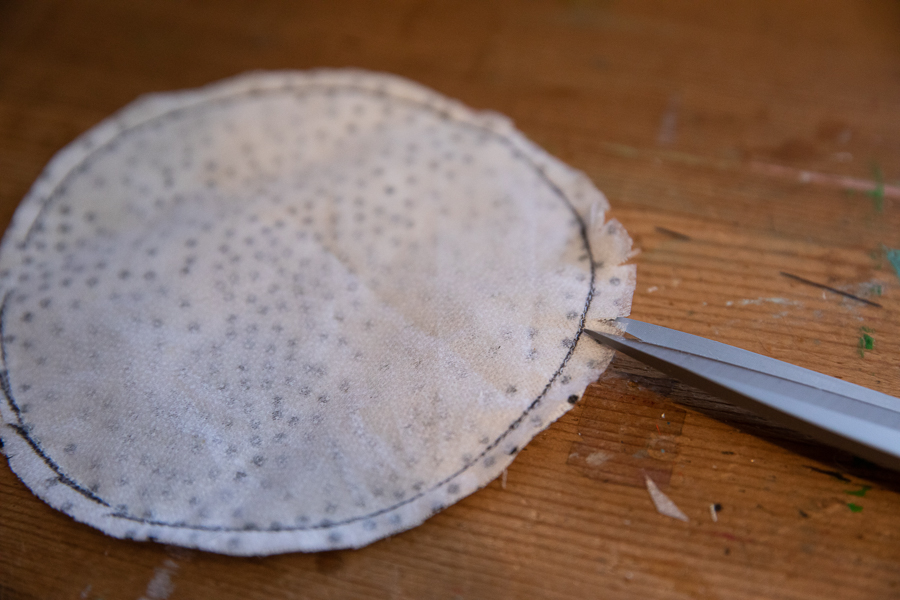
With the scissors make perpendicular snips toward the stitching. Don’t nick those stitches!
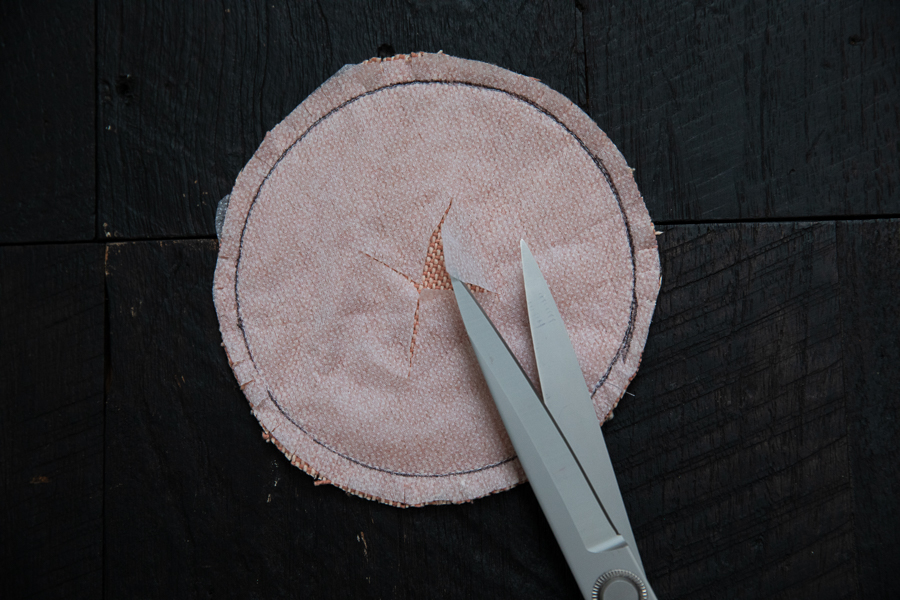
Pinch the two layers apart and snip a cross in the center of the interfacing, just big enough to turn the right sides out through the opening. Very carefully turn the appliqué inside out. The interfacing is delicate, so no bull at a gate!
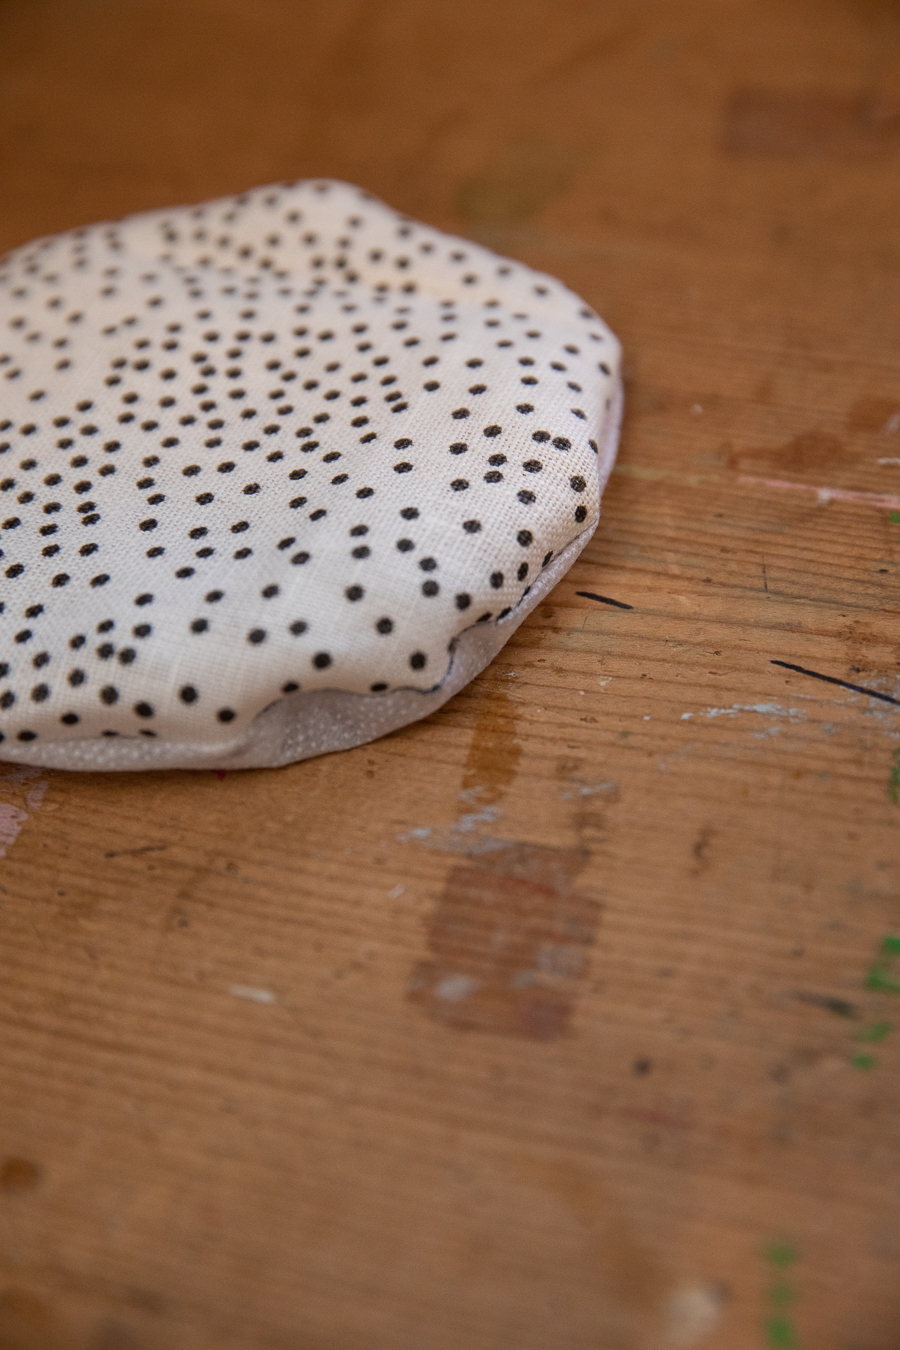
Very gently manipulate the fabric until you have a perfect shape. You can use something blunt-ended like a chopstick to push out the edges, but be careful!! Finger-press the edges so everything is nice and flat.
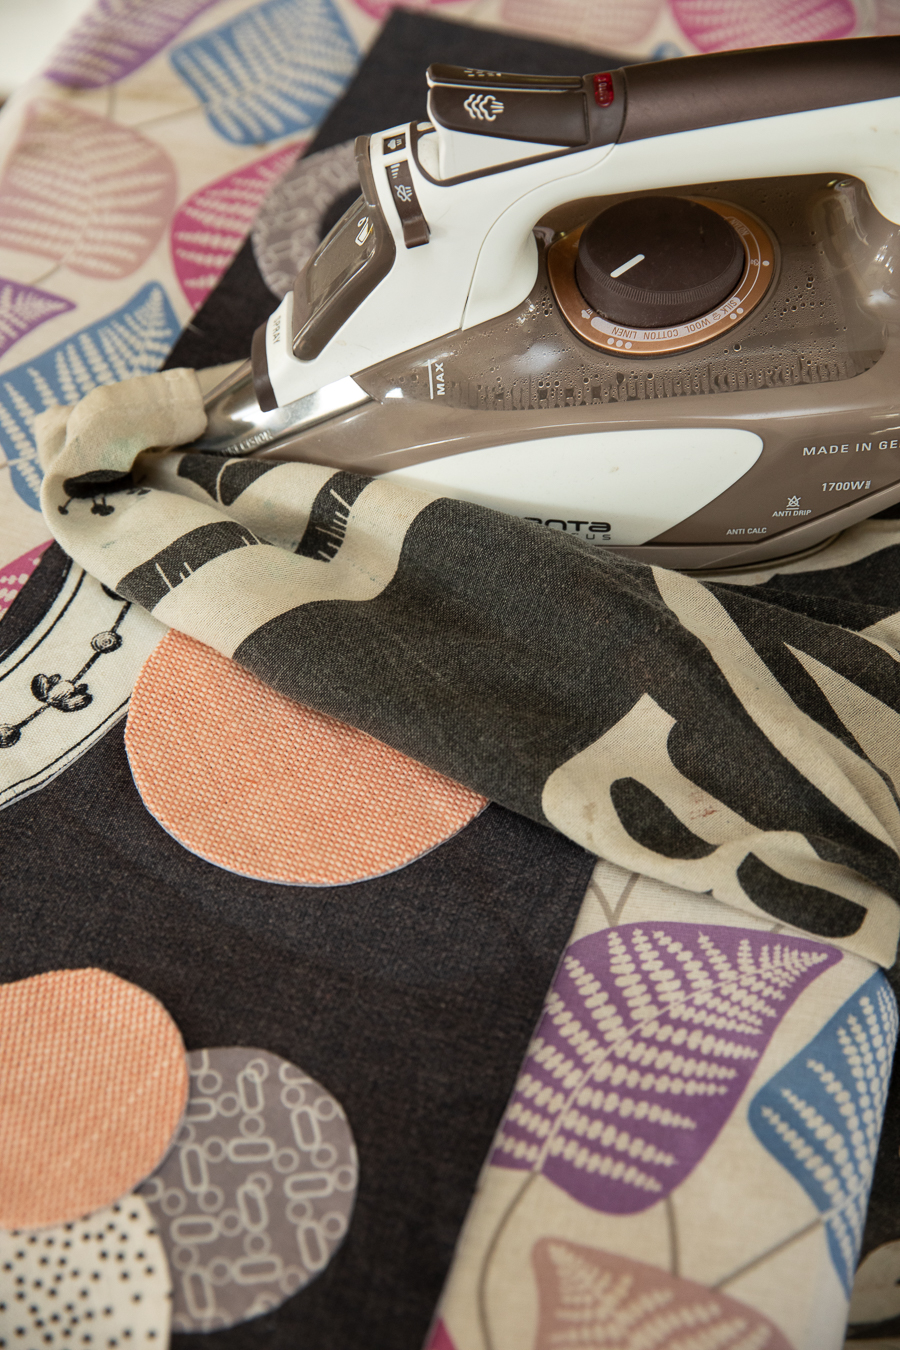
Now you’re ready to place the patch in its resting place. Make sure the interfacing is flat, then pin the appliqué to the material. Steam-baste along the edges of the appliqué with the tip of the iron. Remove pins.
Cover the fabrics with a damp cloth or teatowel and press down firmly for 10 seconds. Repeat by lifting and slightly overlapping the iron until all the interfacing is fused.
Steam press without the cloth.

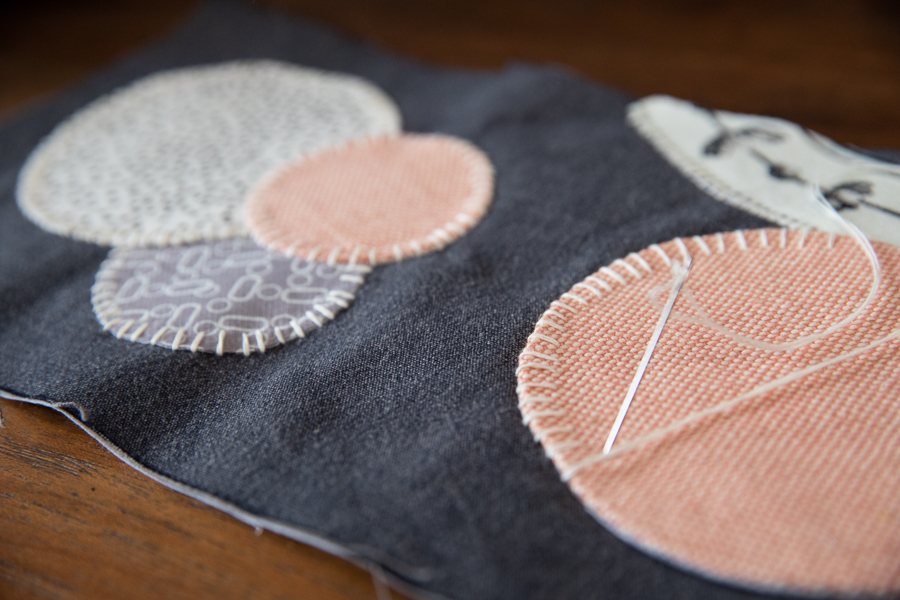
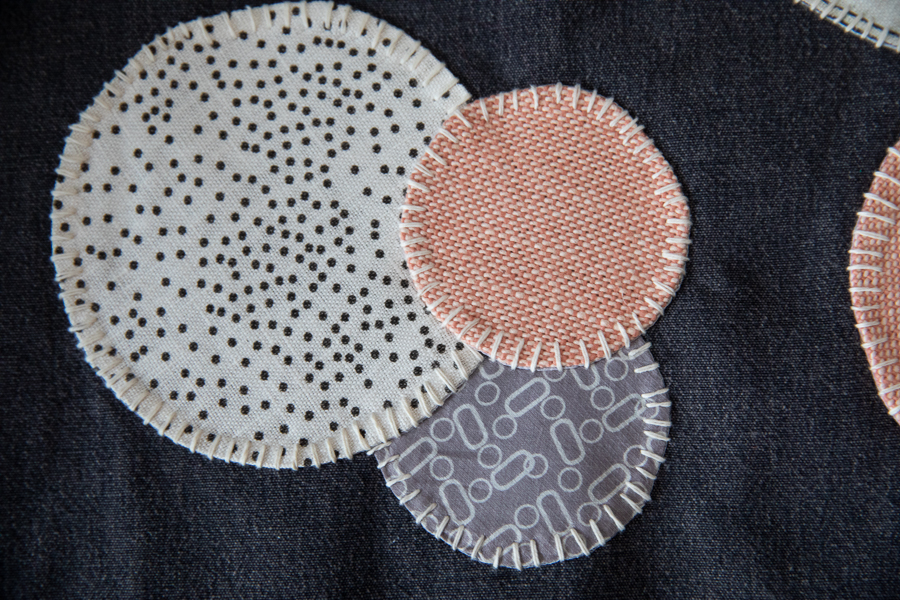
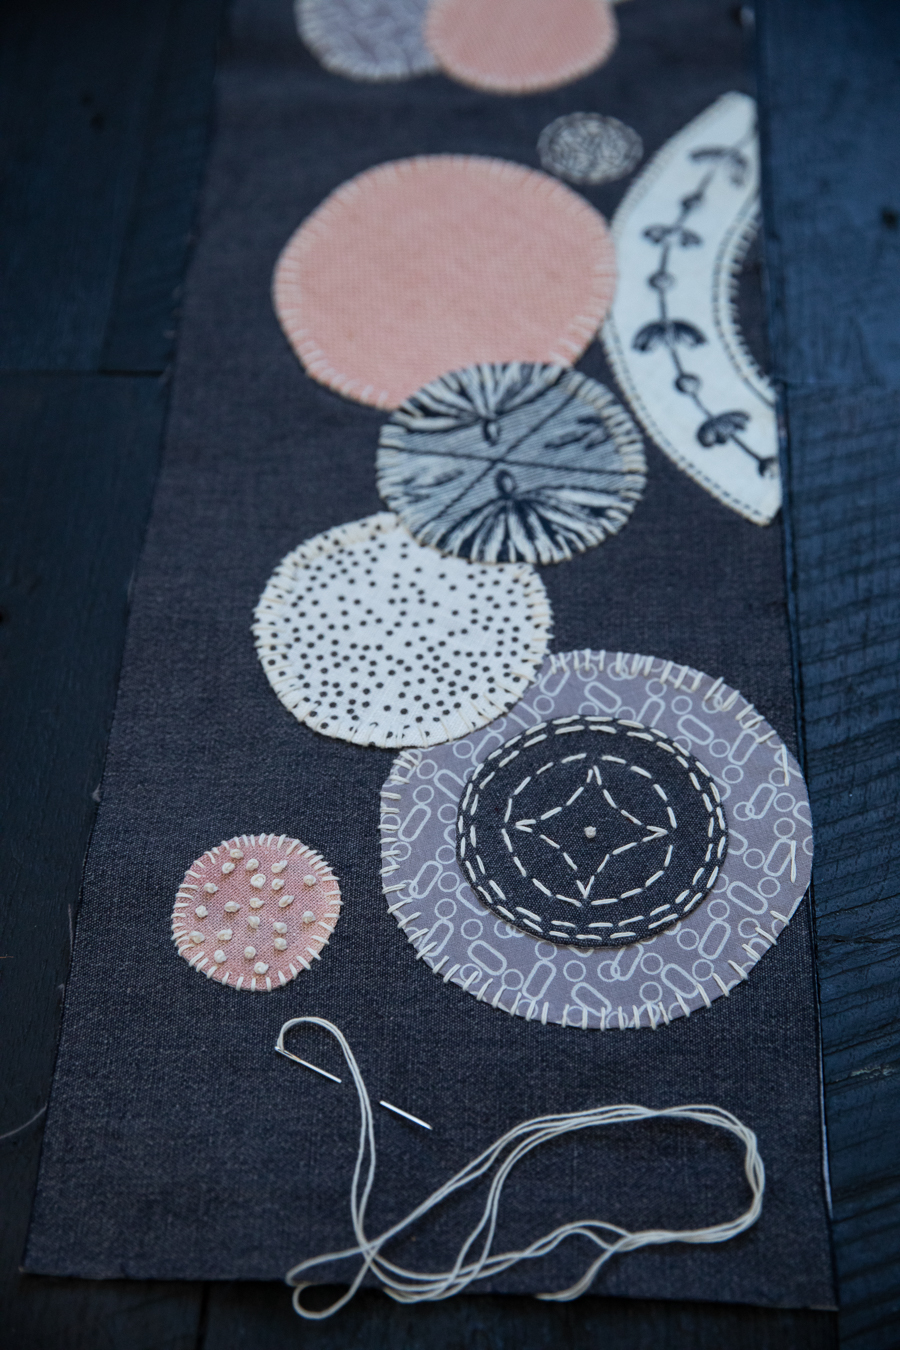
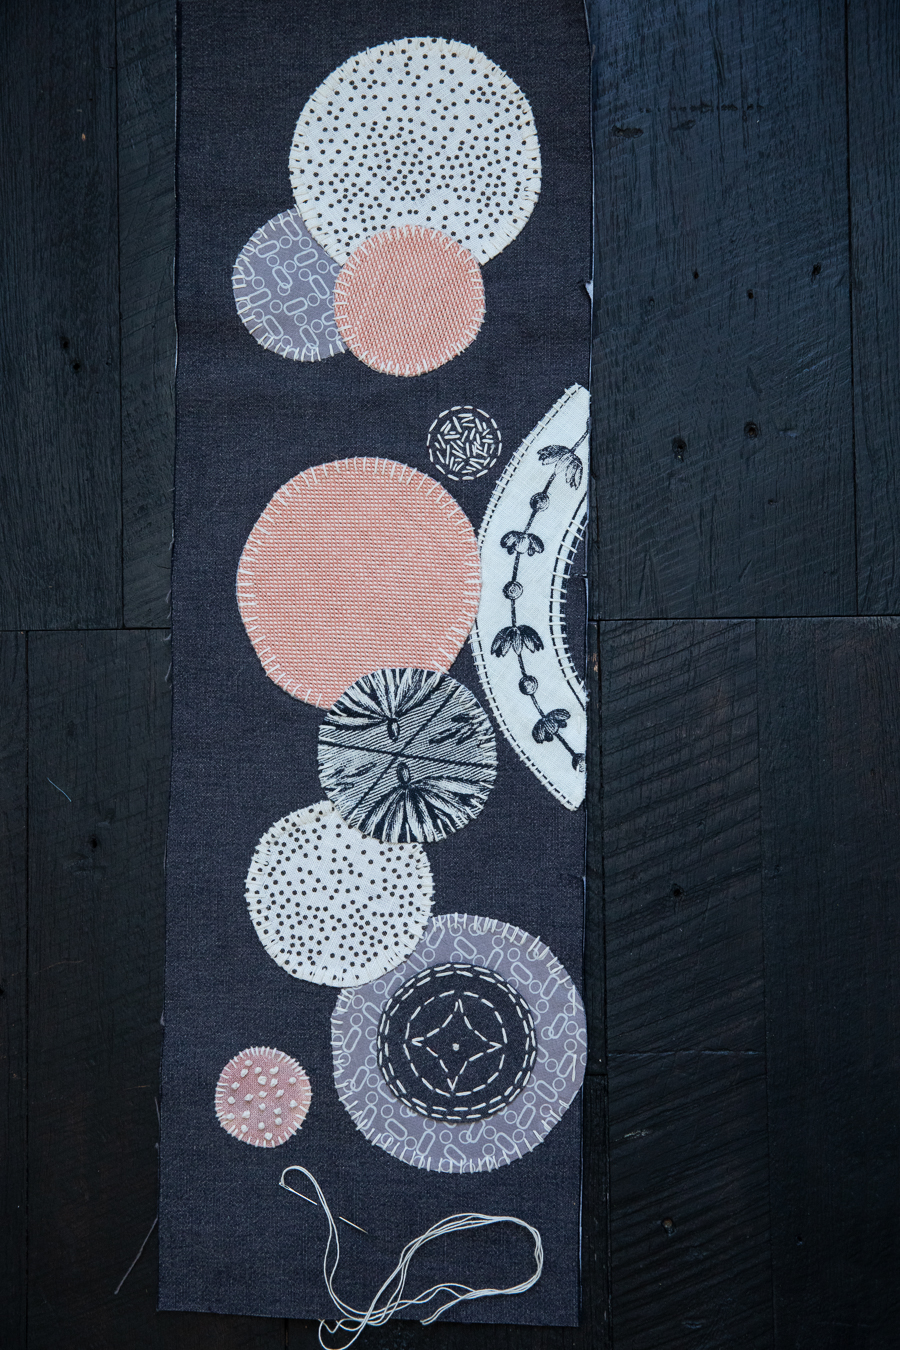
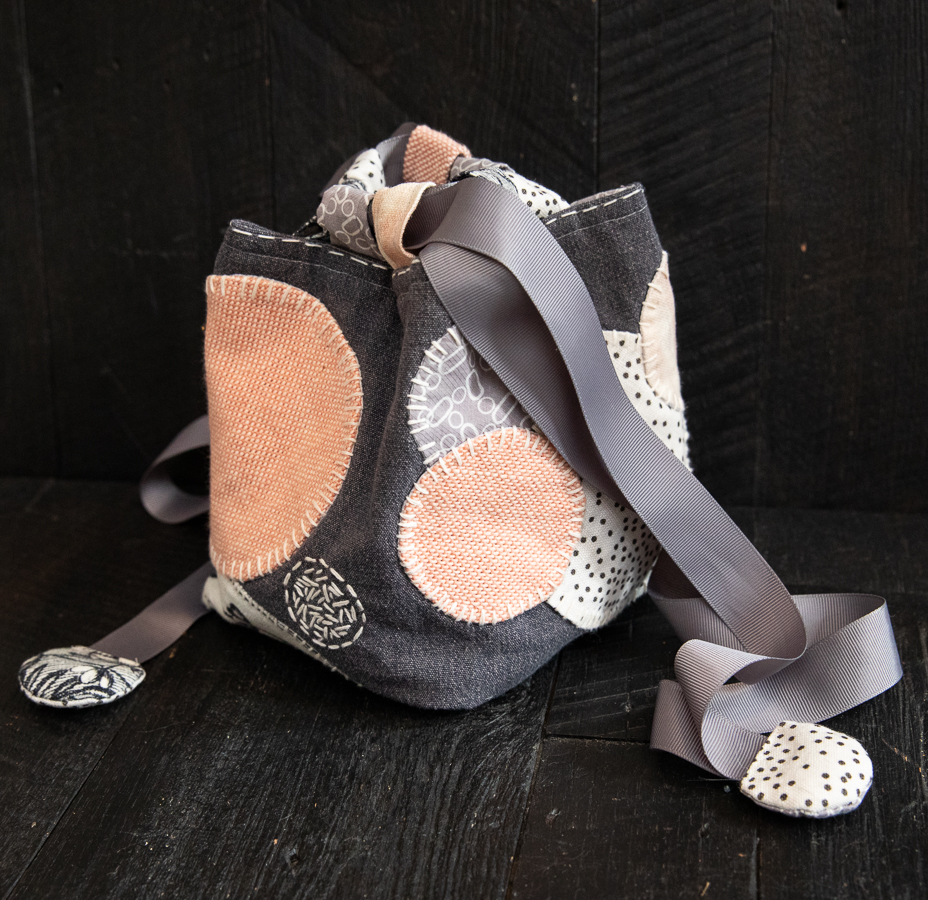
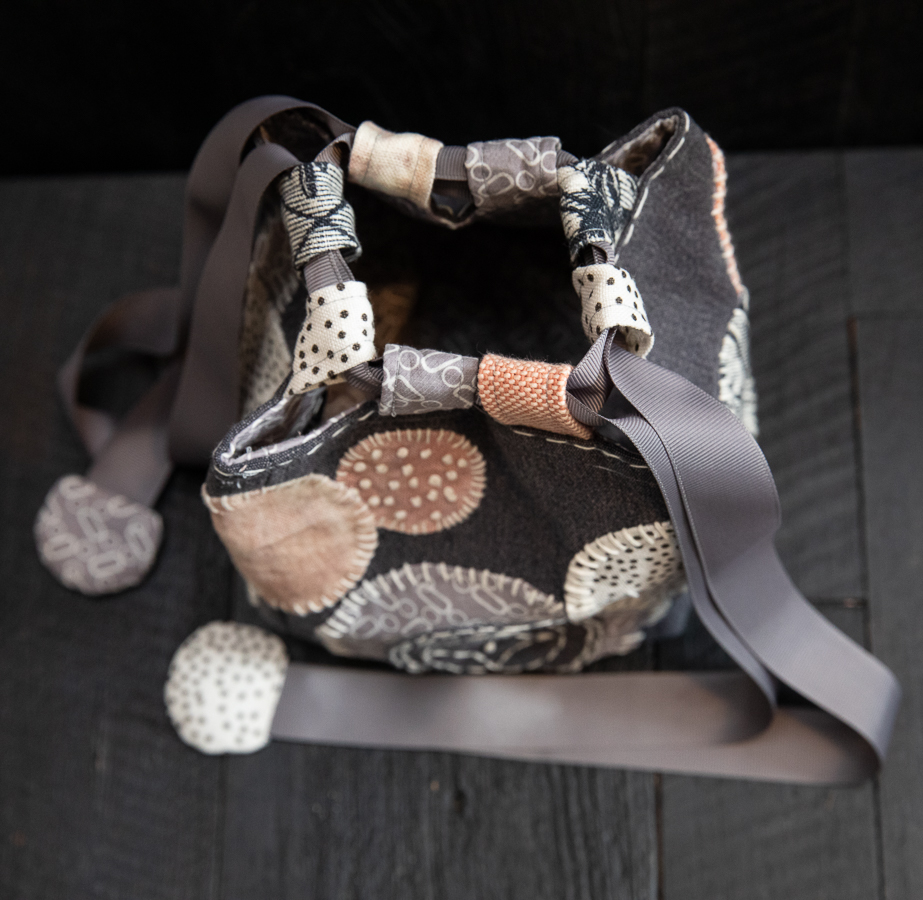
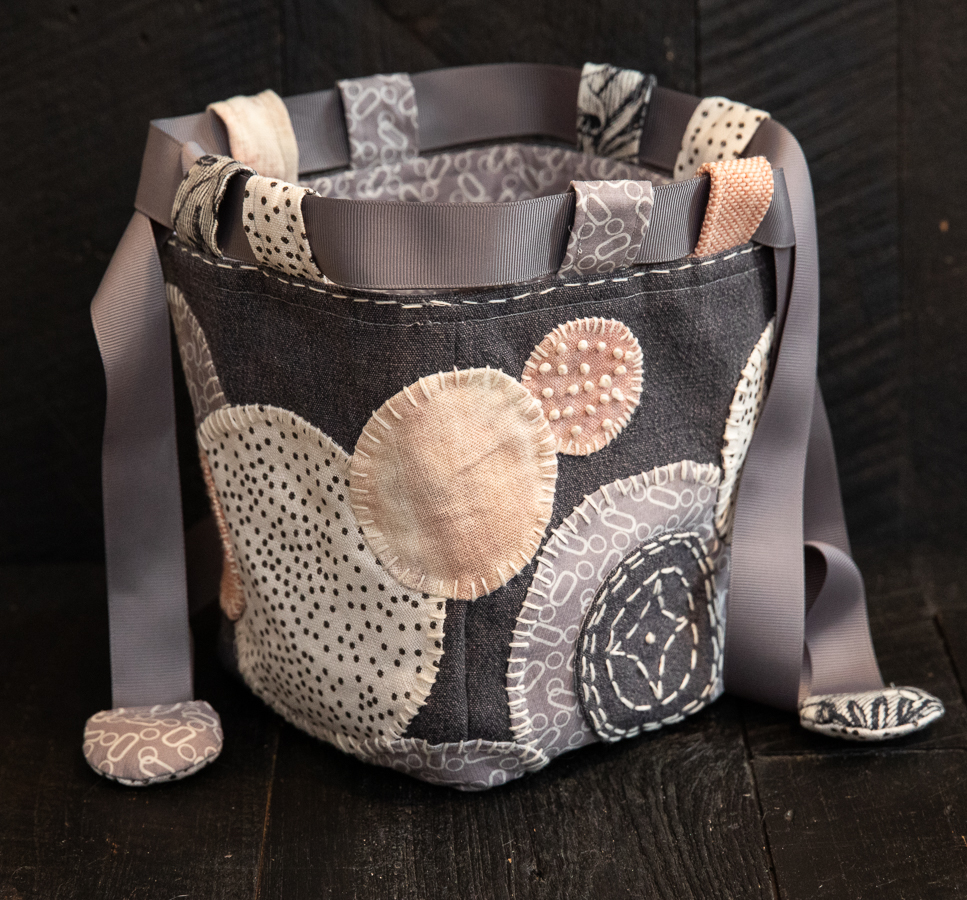
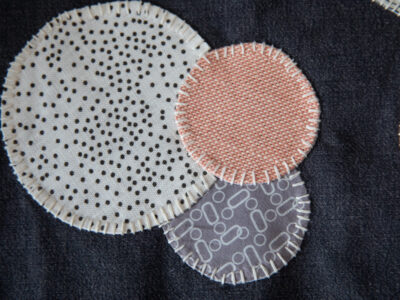
To add some fanciness and give a more secure bond I also stitched the patches. You could use a running, blanket, or whip stitch, as I did here.
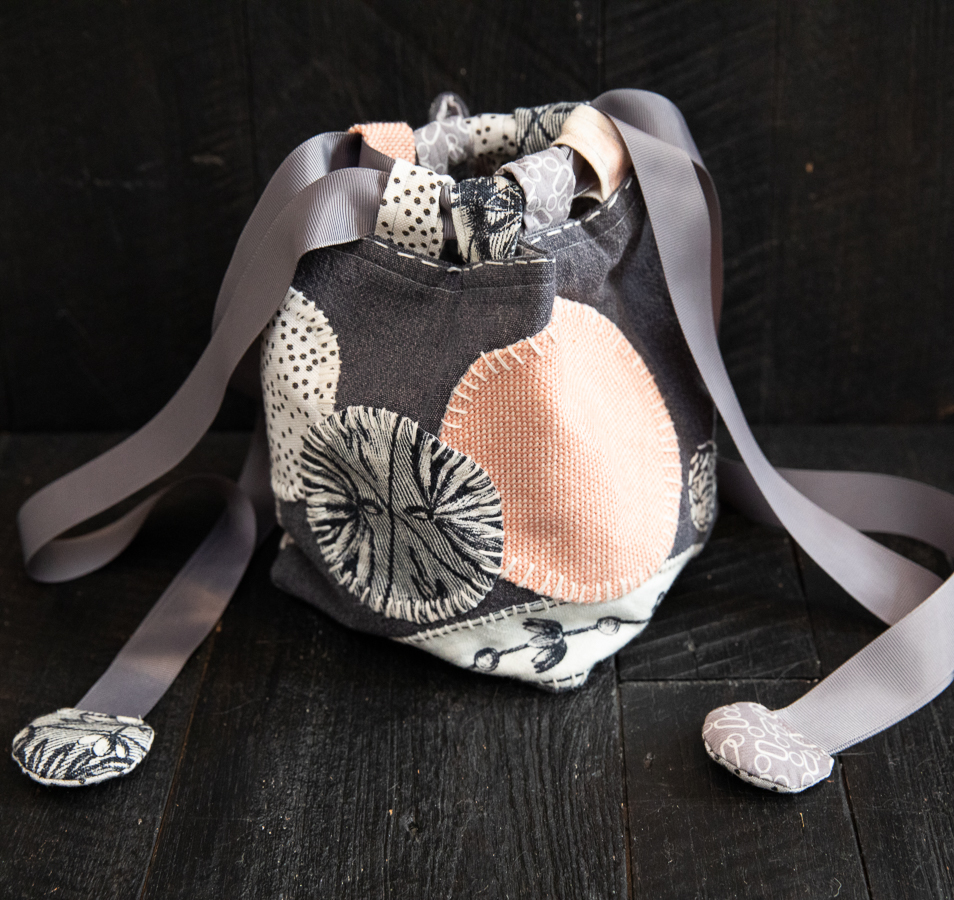
Can anyone guess what I’m making? I’ll send the first correct answer a bundle of gorgeous designer fabrics, perfect for appliqué, from my stash!
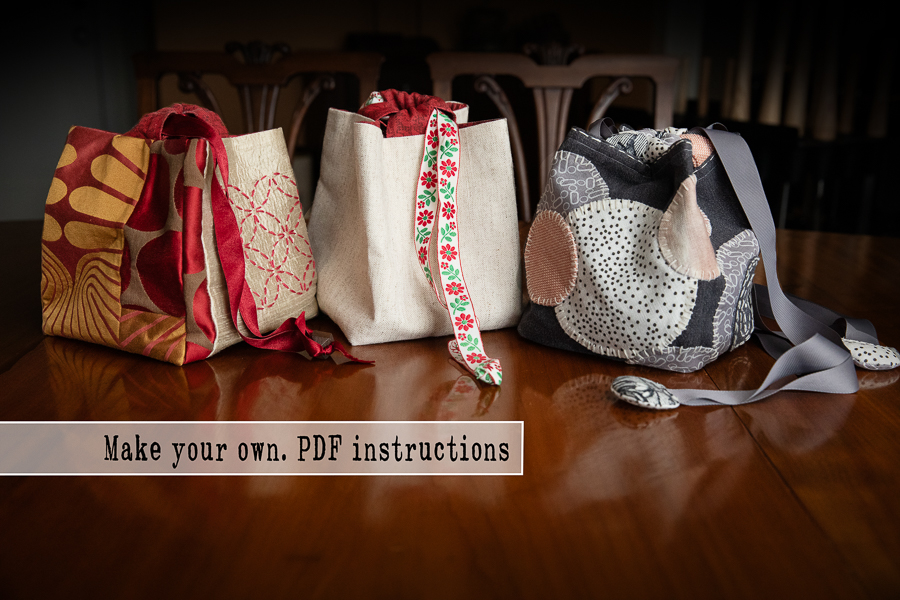
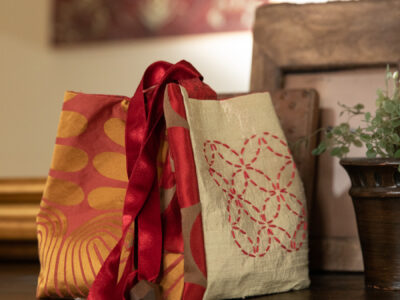
**Update** So it’s been a long time coming (about a year!!!), but I finally got around to designing and making the Japanese Rice Bag, or Komebukuro I had planned. I’m so happy with how it turned out😊 I documented the process, taking loads of photos and writing detailed instructions to produce a downloadable sewing tutorial that’s available in my store. Please check it out!
In the meantime, happy stitching!

4 comments for “Making appliqué patches—a very easy tutorial!”