My latest passion is slow stitching, particularly boro and sashiko styles.
It’s just so relaxing to use needle and thread to create art. Hand sewing instantly calms my body and mind as I enjoy the process of stitching for stitching’s sake. It’s not about mending or sitting at your sewing machine, nor having a goal or a timeframe, it’s just mindful, put-your-feet-up, therapeutic time.
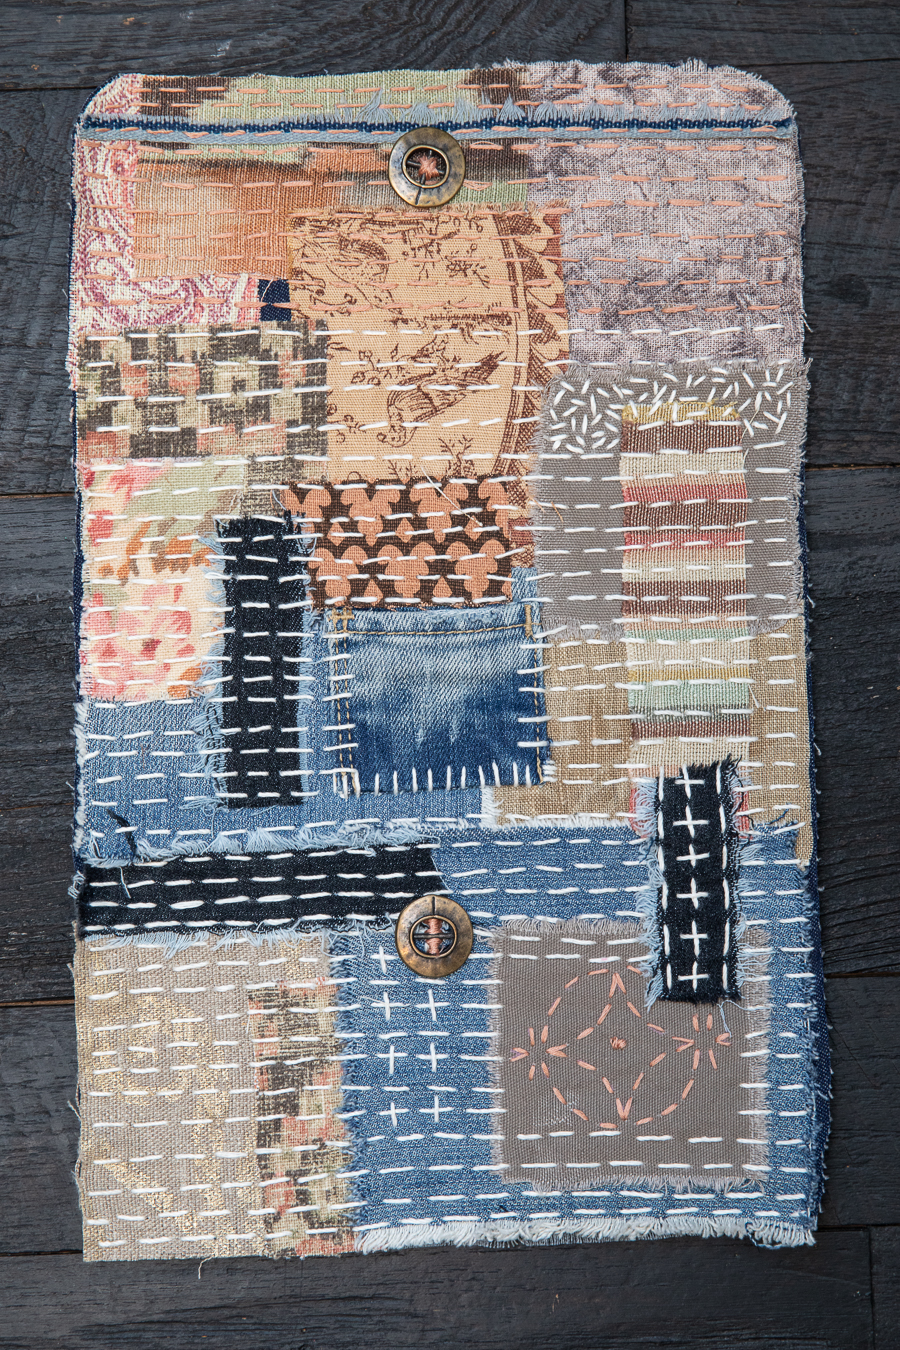
I love selecting the fabrics from my stash of designer samples, choosing the color scheme, mixing the patterns, bringing them all together to form a gorgeous canvas for the stitching.
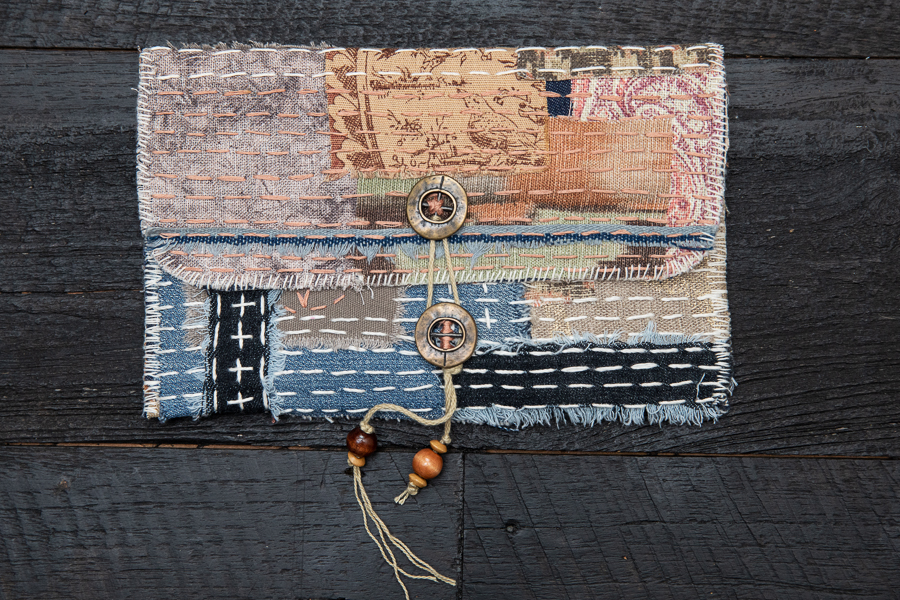
My online store, Etsymakeartlife, has a kit containing everything you need to create a super-trendy, maximalism-look clutch purse. Even though it’s easy to make, the end results are so impressive and just beautiful.

To make this 9 x 5.5″clutch I used:
9×14″ sturdy denim base for stitching
9X14″ silk lining panel
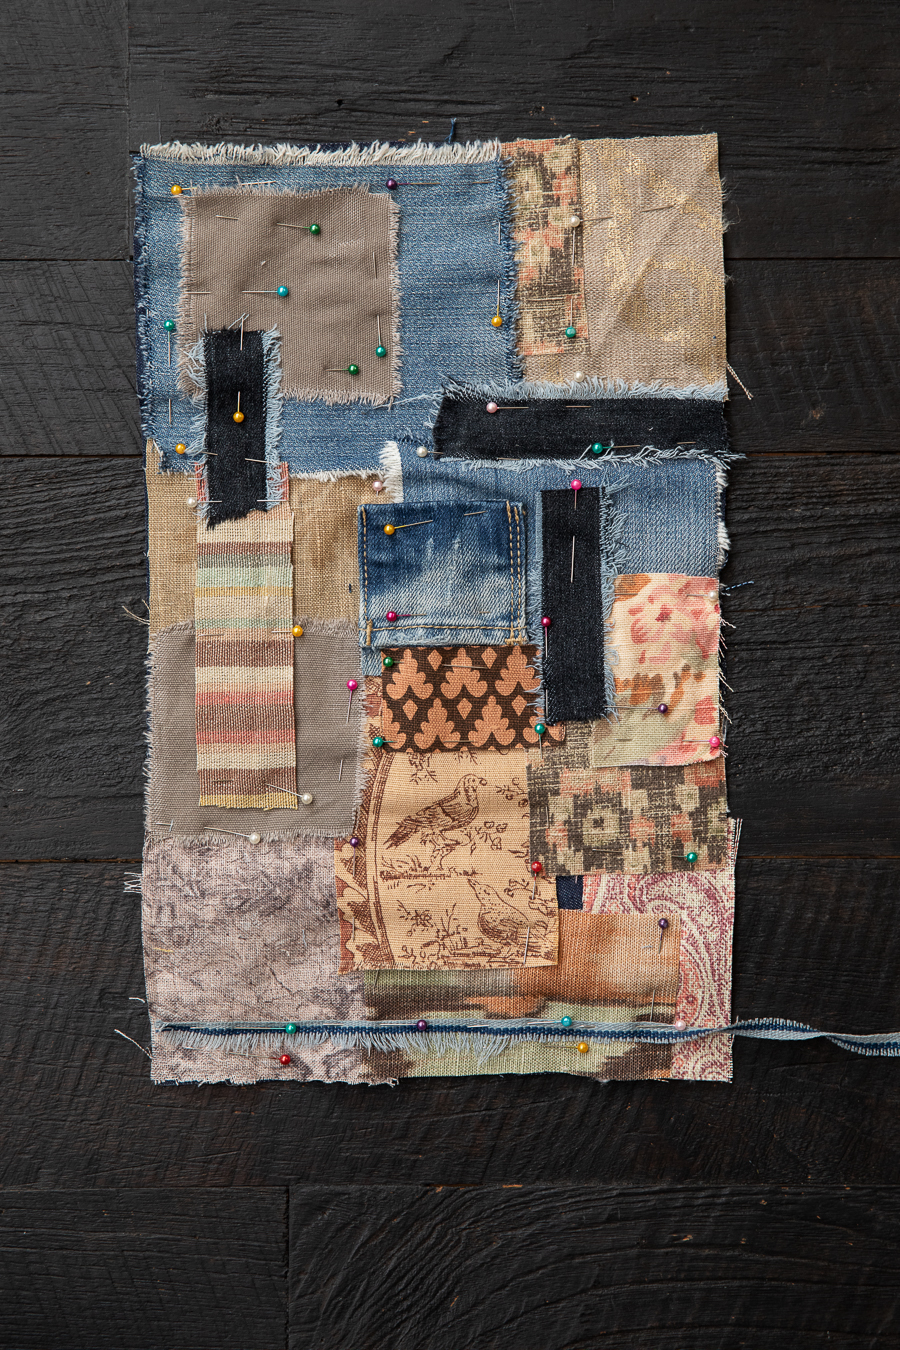
17 rectangles of linen and cotton fabrics
10 yards of thick sashiko cotton thread
7 yards of thin sashiko cotton thread
1 skein of dusky pink embroidery floss
Wood beads and cord for the closure
2 buttons for the closure
1 sashiko sewing needle
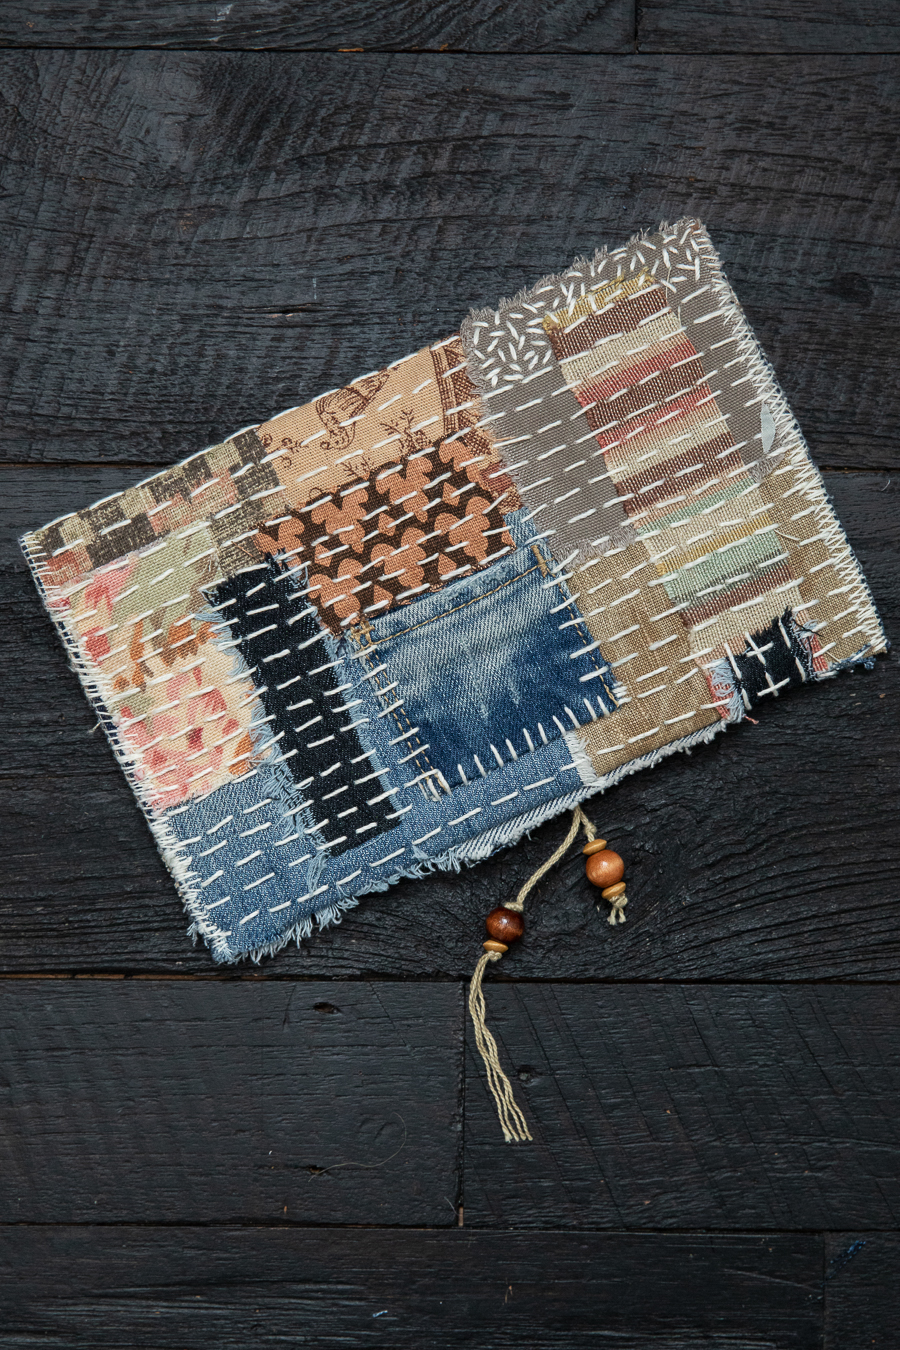
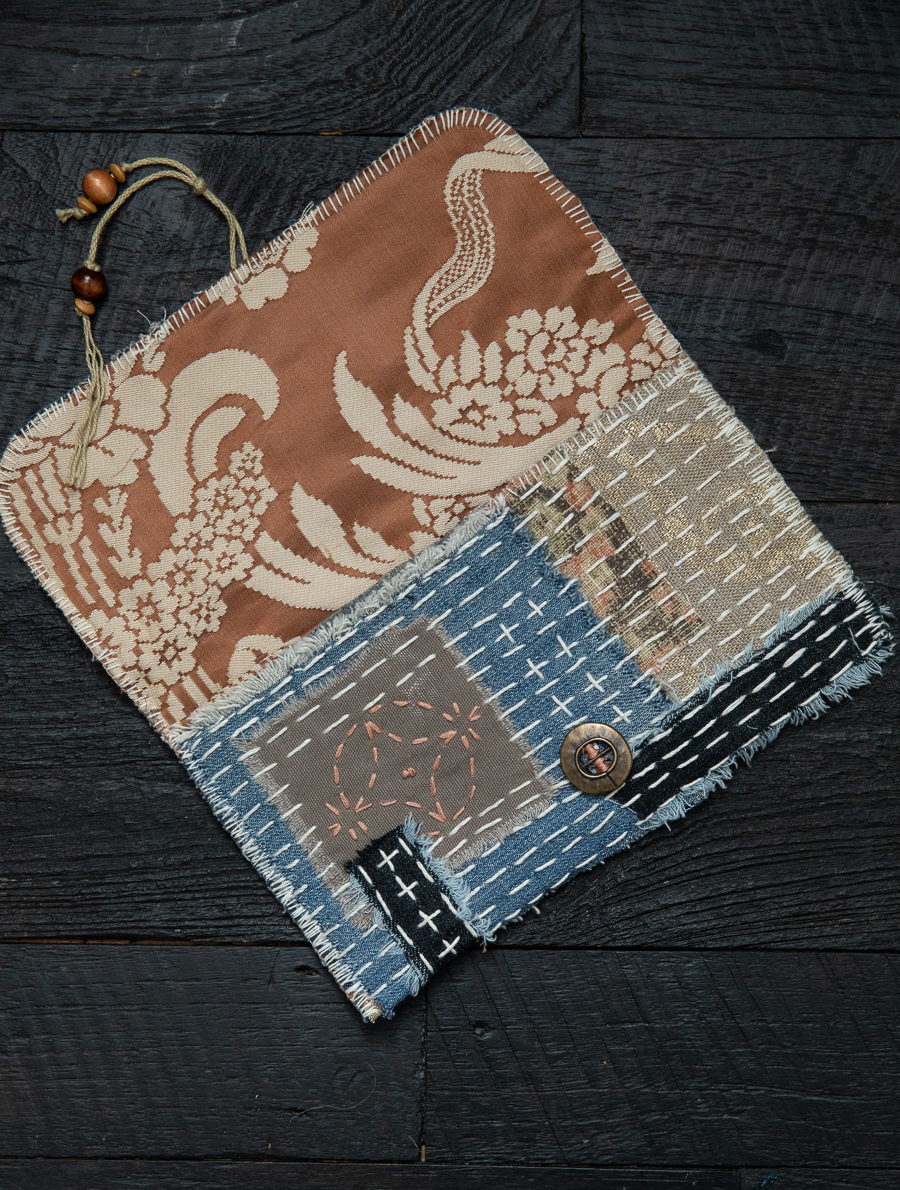
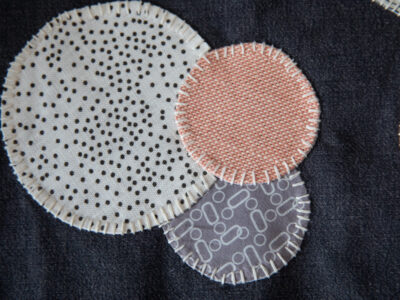
I start with the piece of upcycled denim cut from some old jeans. Then I layer the small fabric pieces in a random pattern on top, making sure they overlap each other by about a centimeter (half an inchish). All the edges are raw which allows for some fraying to give a vintage-y vibe. When I’m happy with the layout I carefully pin everything in place, or you can use a water-soluble fabric glue stick.
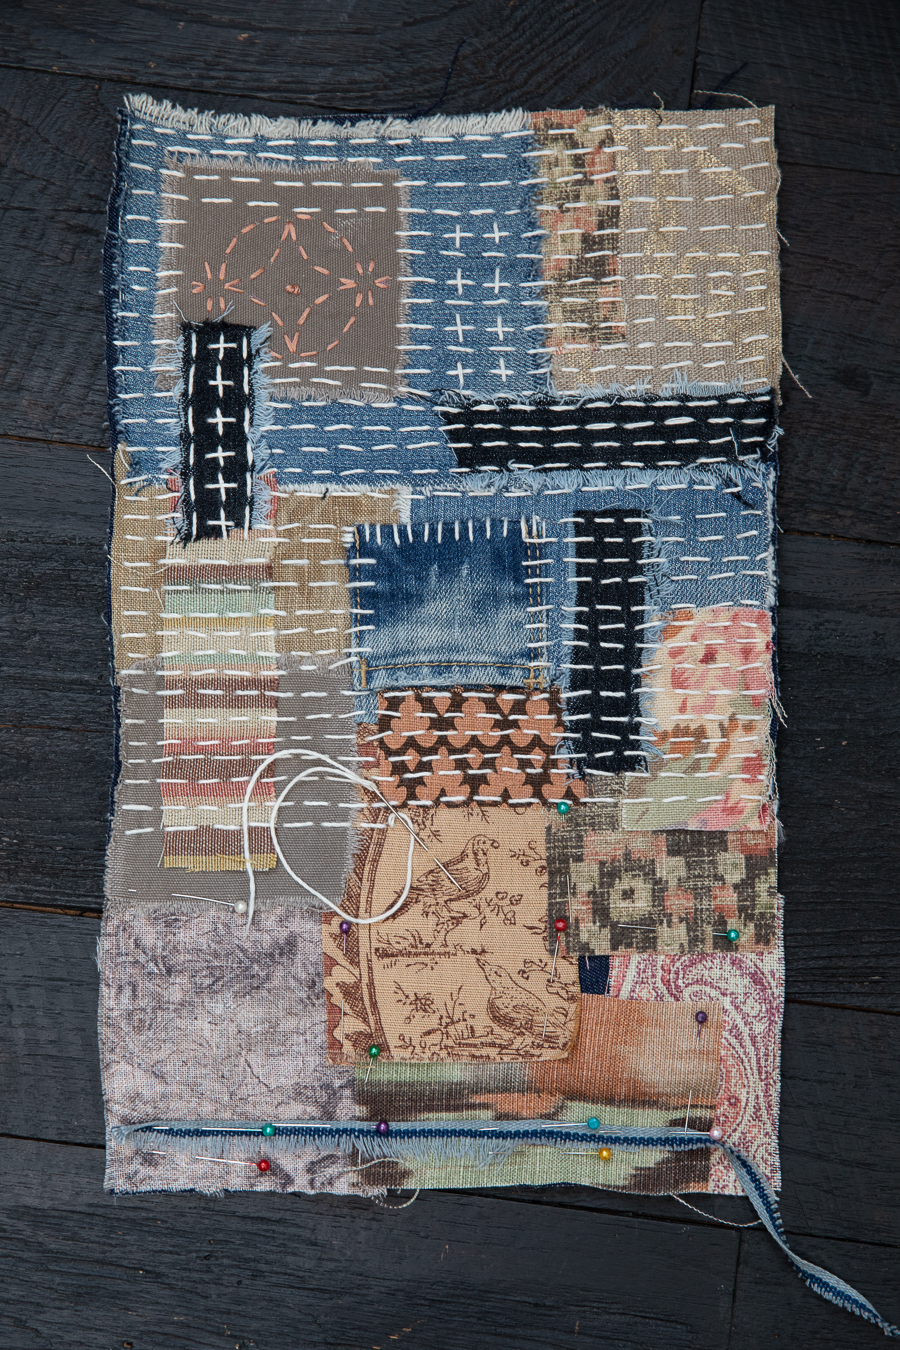
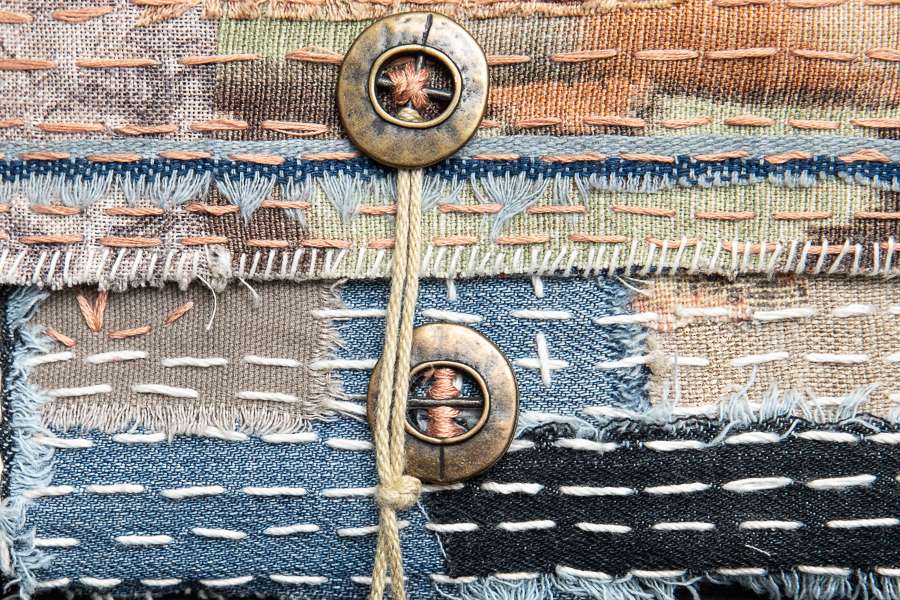
Now let the slow-stitching begin! I’ve used a simple running stitch with the thick sashiko cotton to secure all the patches. I mixed it up a bit and stitched a few rows in the blush pink and added some crosses and a small “shippo tsunami” section.
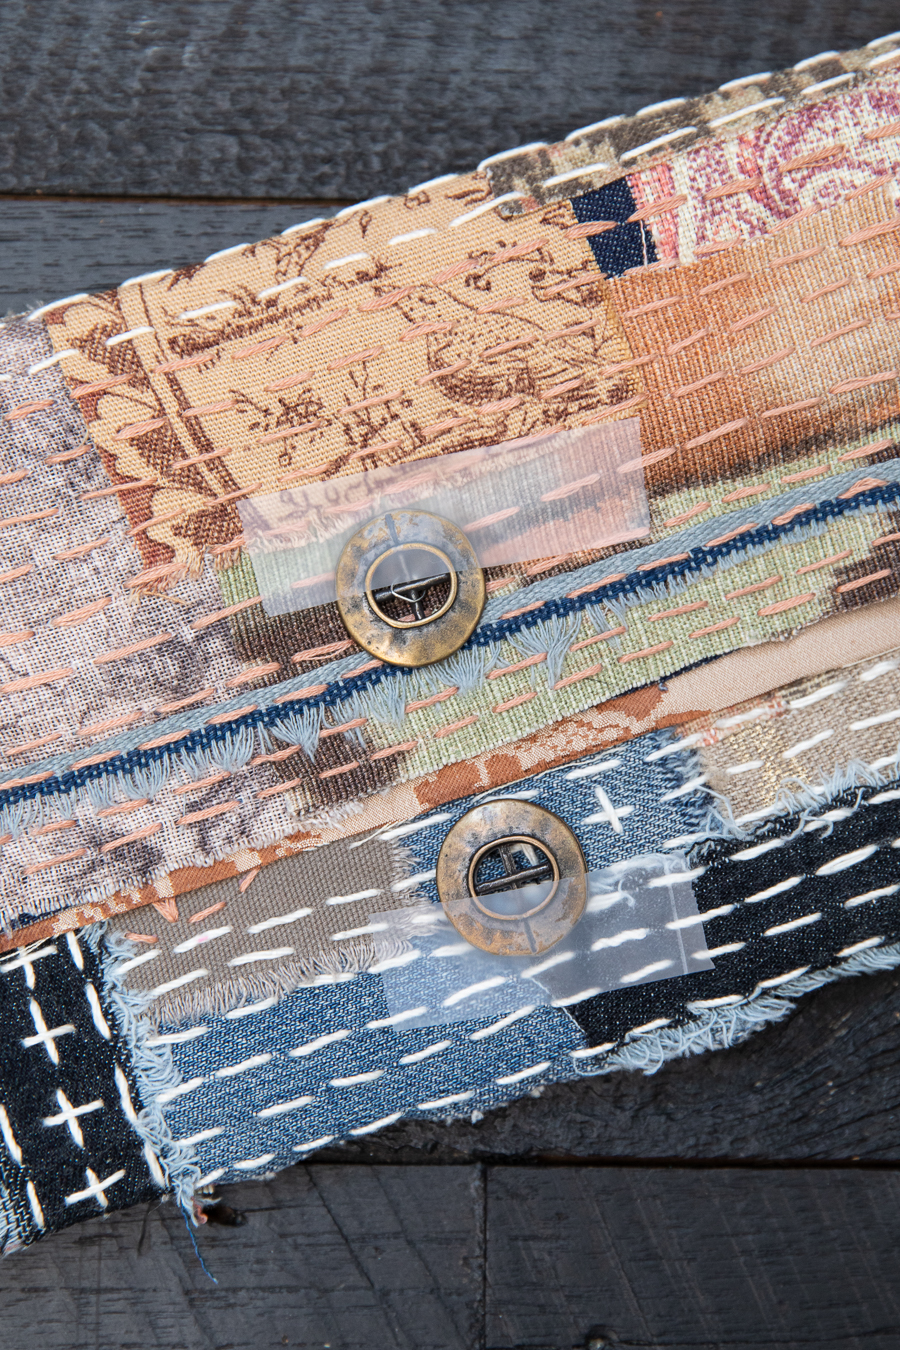
I decided to round the 2 corners which will be the flap of the purse. Next, I positioned the buttons for the closure by folding the panel in a mock-up of the final design. The fold is 5″ from the bottom and the flap is about 4″ deep. I temporarily secured the buttons with a bit of tape before sewing them on.
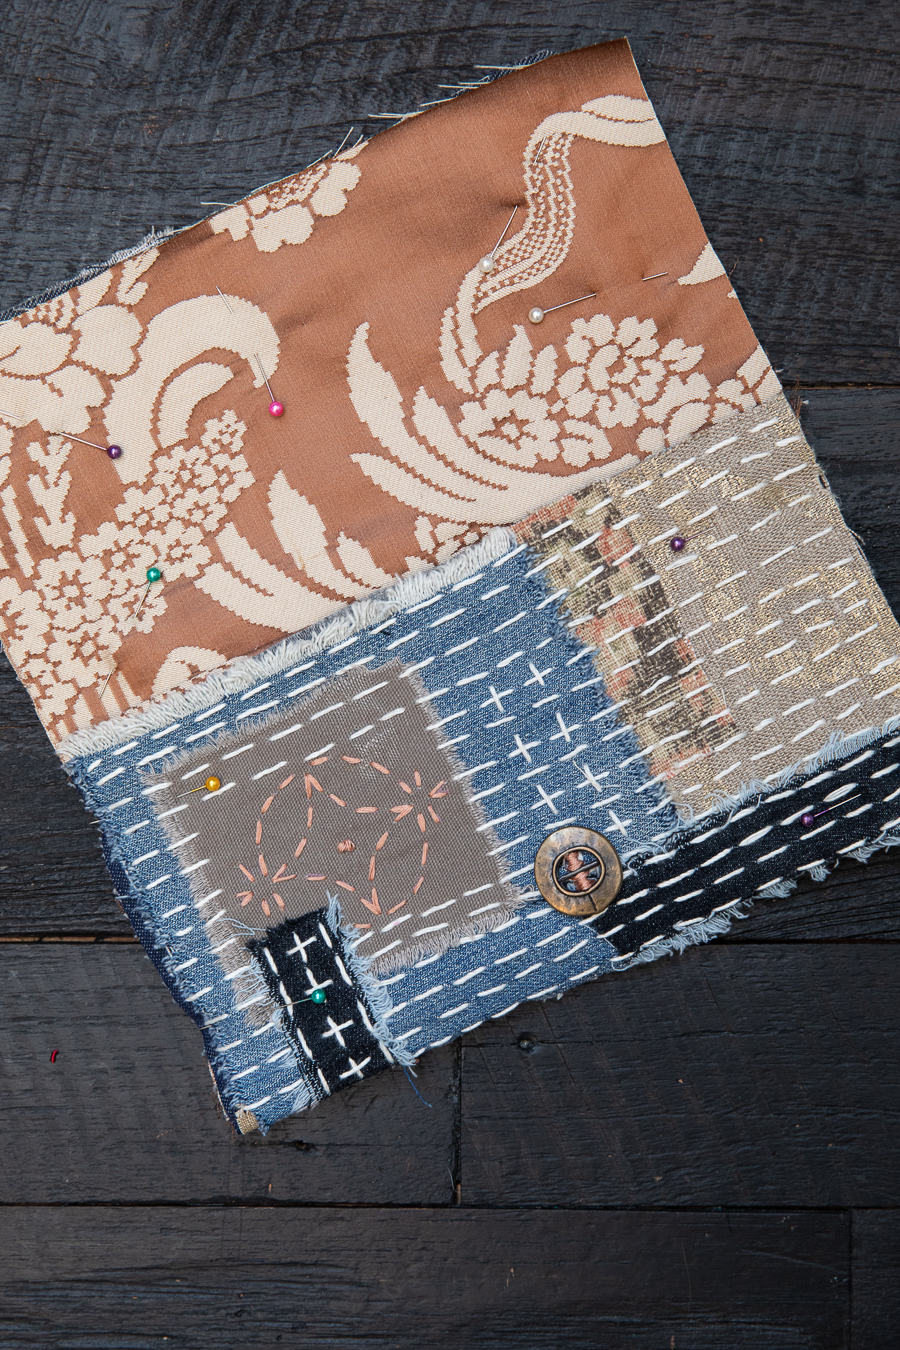
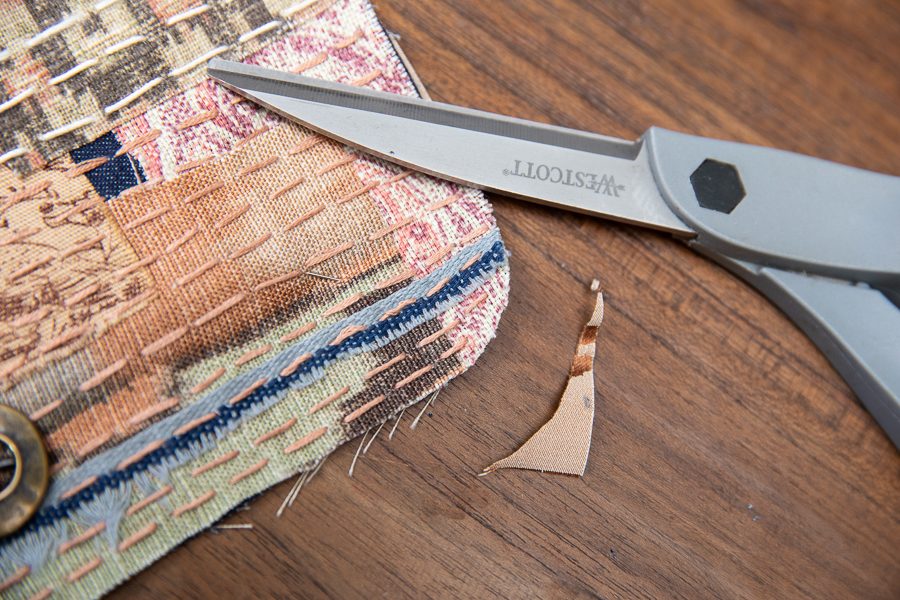
Unfold the panel and place your lining fabric on top of it with the wrong sides together. Pin the flap side in place and then fold the pieces 5″ from the bottom to create a pocket. Pin everything together. Your outer stitched design will have shrunk a little so trim off any excess lining fabric.
The bag will be sewn together with a compact over and over stitch using the thin sashiko cotton thread. Start along the top edge of the bag opening, then move to the bottom right-hand side and continue round the three unfinished edges.

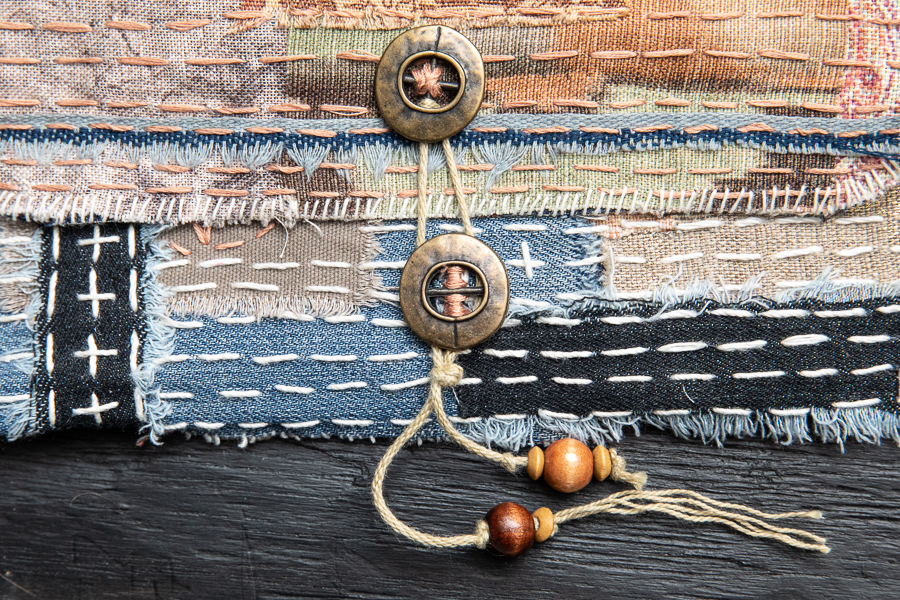
Close the bag and thread the cord through the buttonholes of the flap button.
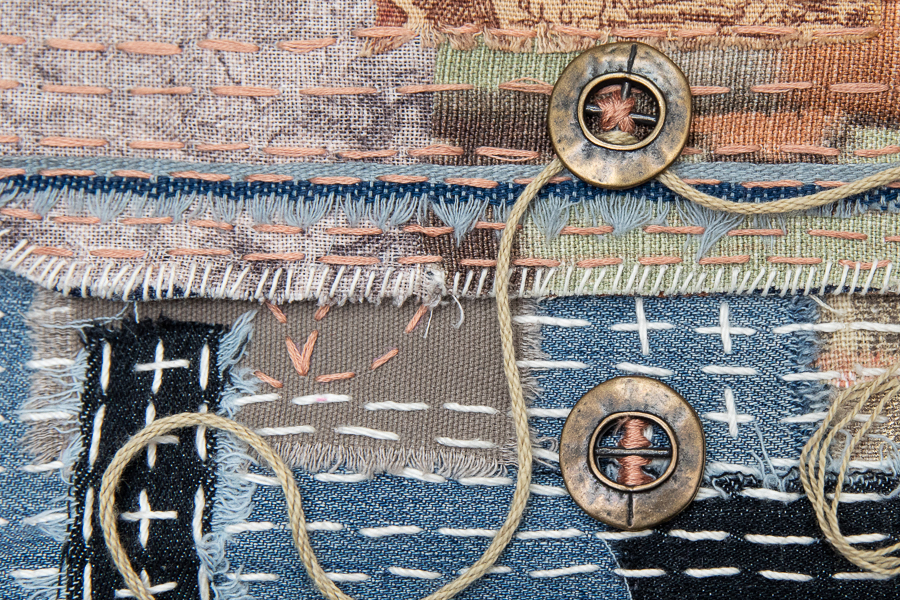
Tie a double knot at the bottom of the lower button to form a loop. Thread the beads through the ends of the cord and secure them with a knot. I find this easier to do by wrapping the ends of the cord with tape and then threading them through the bead.
And there you have it! Your very own, super-cute, totally unique work of handmade art. And, of course, a calmer body and mind!


4 comments for “Boro-style Clutch Bag Tutorial—all hand stitched”