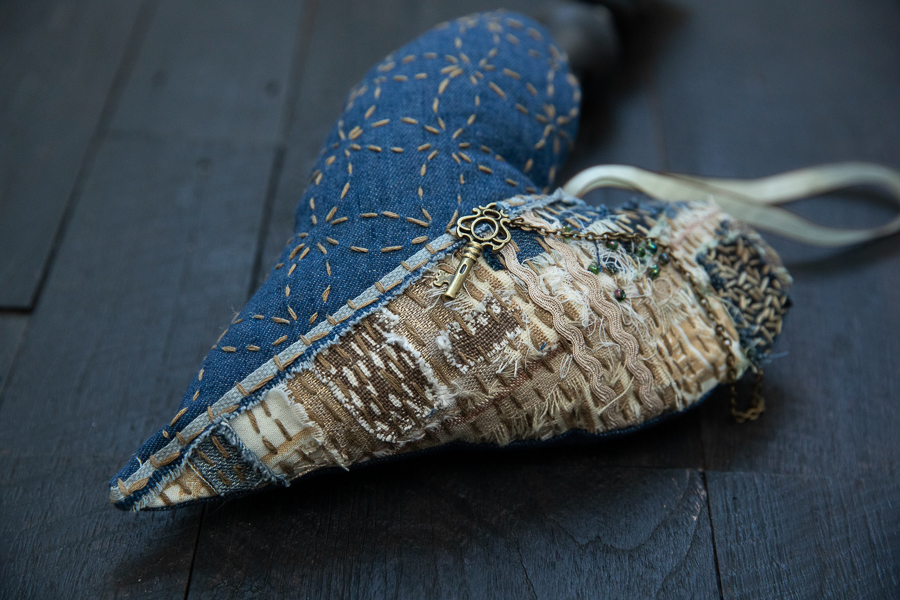
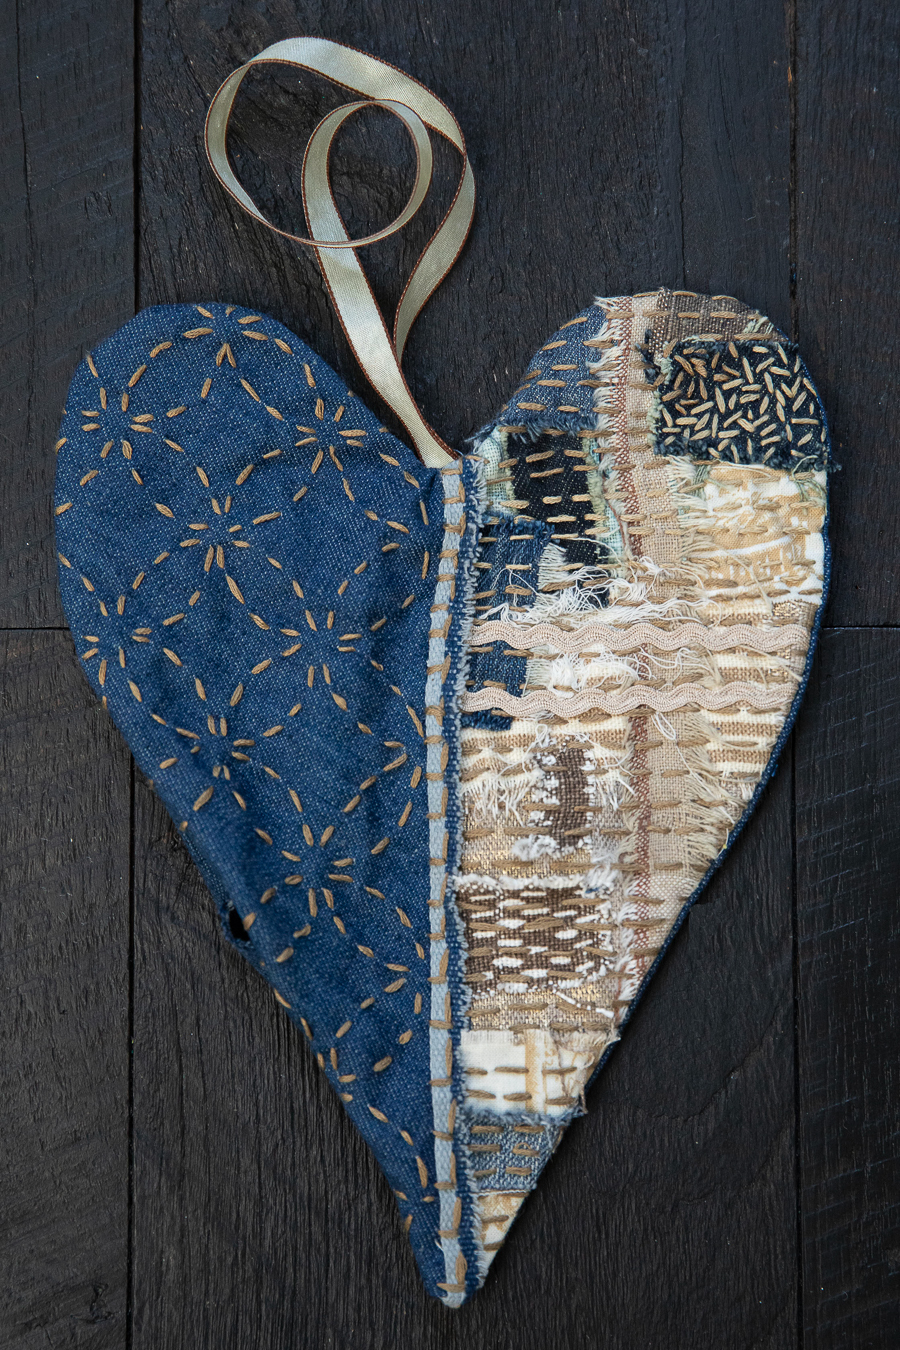
I made this ornament yesterday, but it already looks like a family heirloom. You may know I’m a lover of vintage style, things that are a bit frayed around the edges, a little quirky, and this stuffed heart hit the spot.
Using small scraps of gorgeous fabric from my stash, I was able to slow-stitch this little beauty in a few hours. You do need a sewing machine for this project, but it’s mostly created using simple sashiko-style stitches.
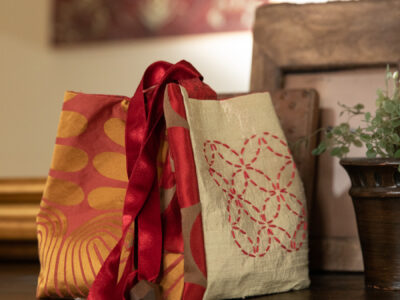
You can buy this heart and her mate from my Etsy store, or go for the kit and get yourself settled down for a while and get those creative juices flowing!
This is what you’ll need to make the heart:
• Paper template of a heart shape. (I went long and thin for a primitive-style look)
• A piece of soft denim large enough to cut two hearts from
• Small pieces of fabric in a mix of patterns/colors
• A piece of ribbon for the hanger
• 1 skein of embroidery thread
• Other bits and bobs for embellishment. I used tiny glass beads, a metal key, a bit of ric-rac, a piece of metal chain…
• A couple of big handfuls of fiberfill/polyester stuffing
• Paper
• Marker pen
• Scissors. I love these
• Sashiko sewing needle
• Pins
• Optional sashiko embroidery template and marking pencil
• Sewing machine
So first things first. Make your template. I folded a letter-sized piece of paper in half vertically and drew half a heart shape. Cut this out, still in its folded state.

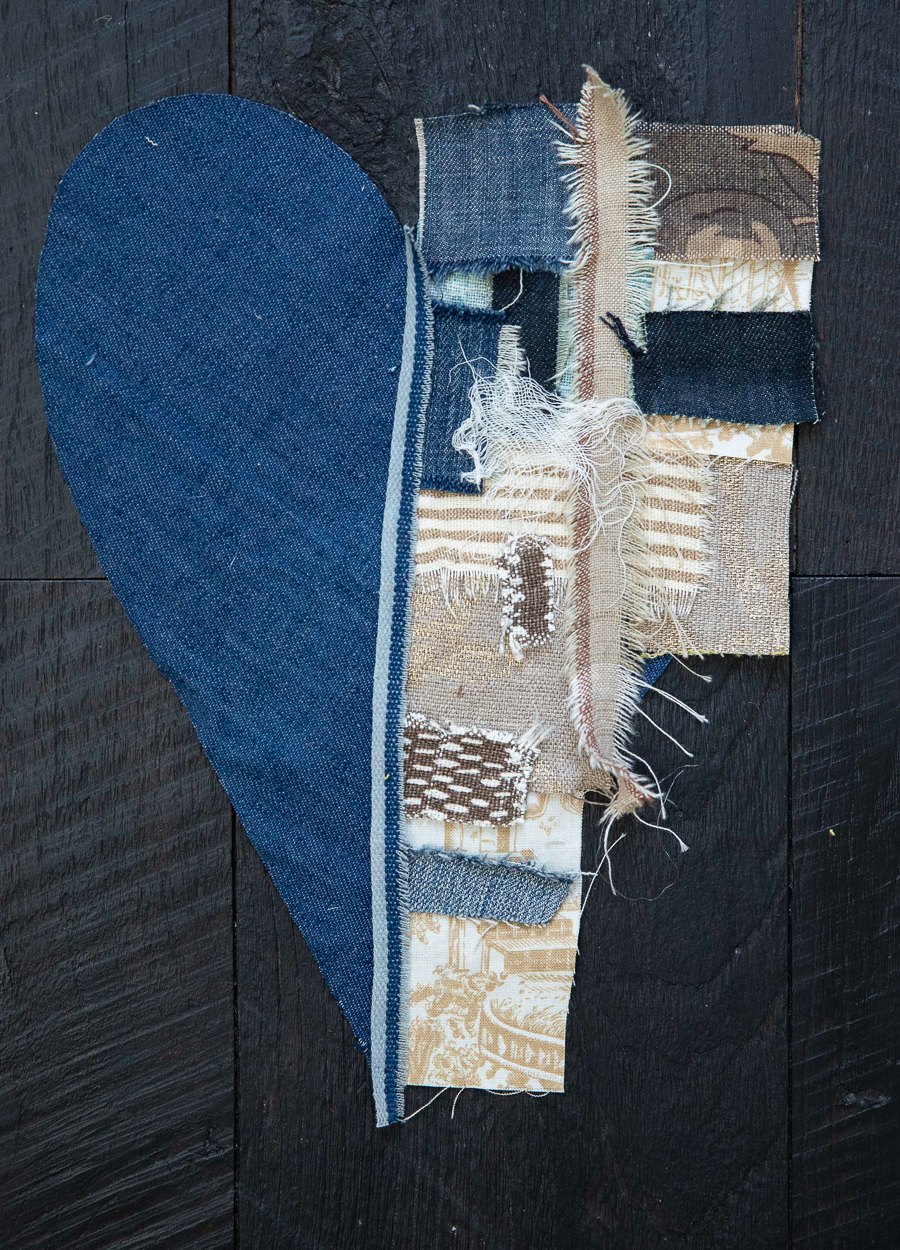
Unfold the template and place it on the wrong side of the denim and draw around it. Cut out one denim heart.


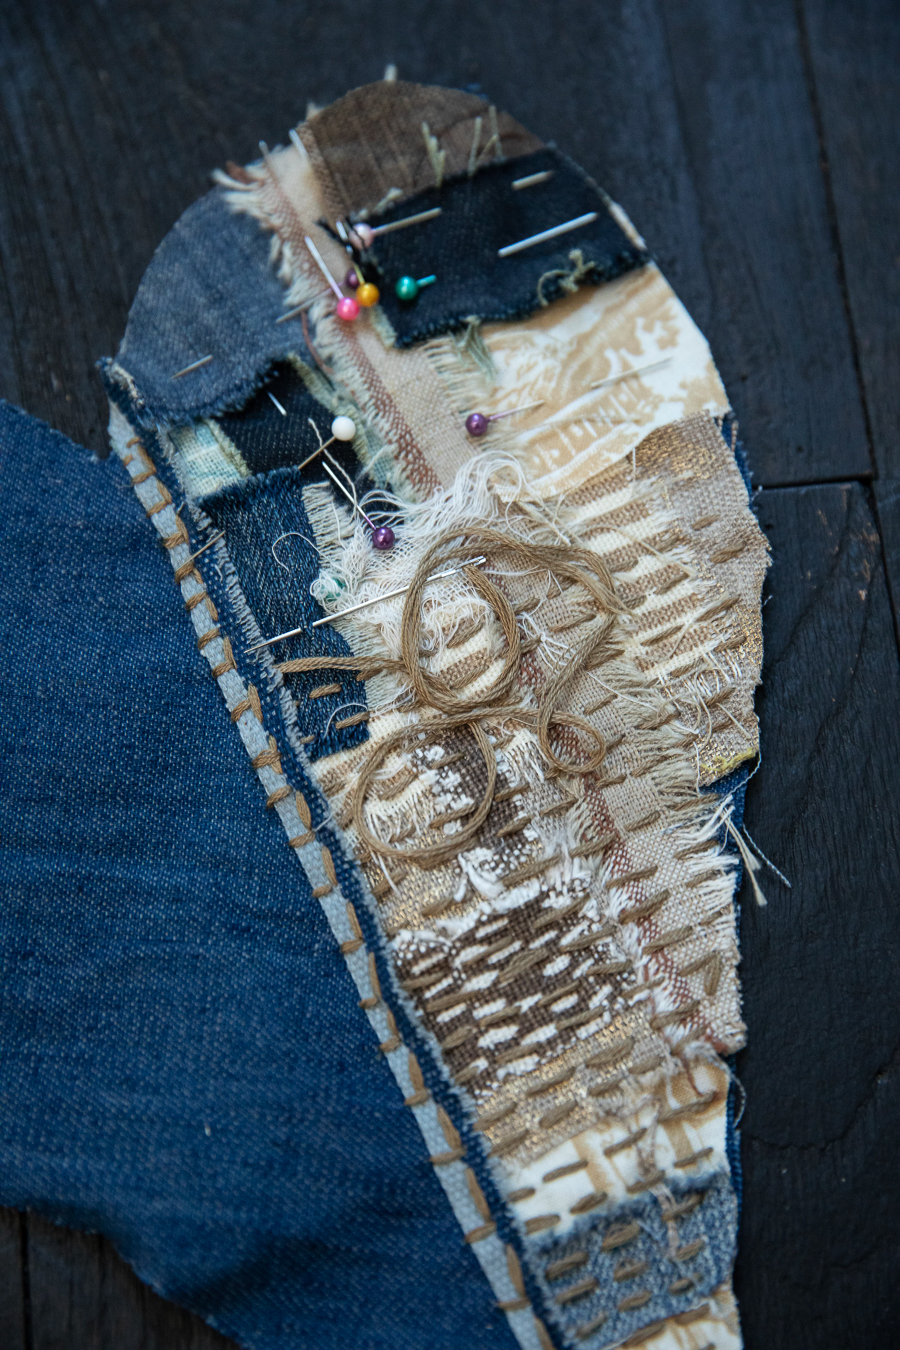
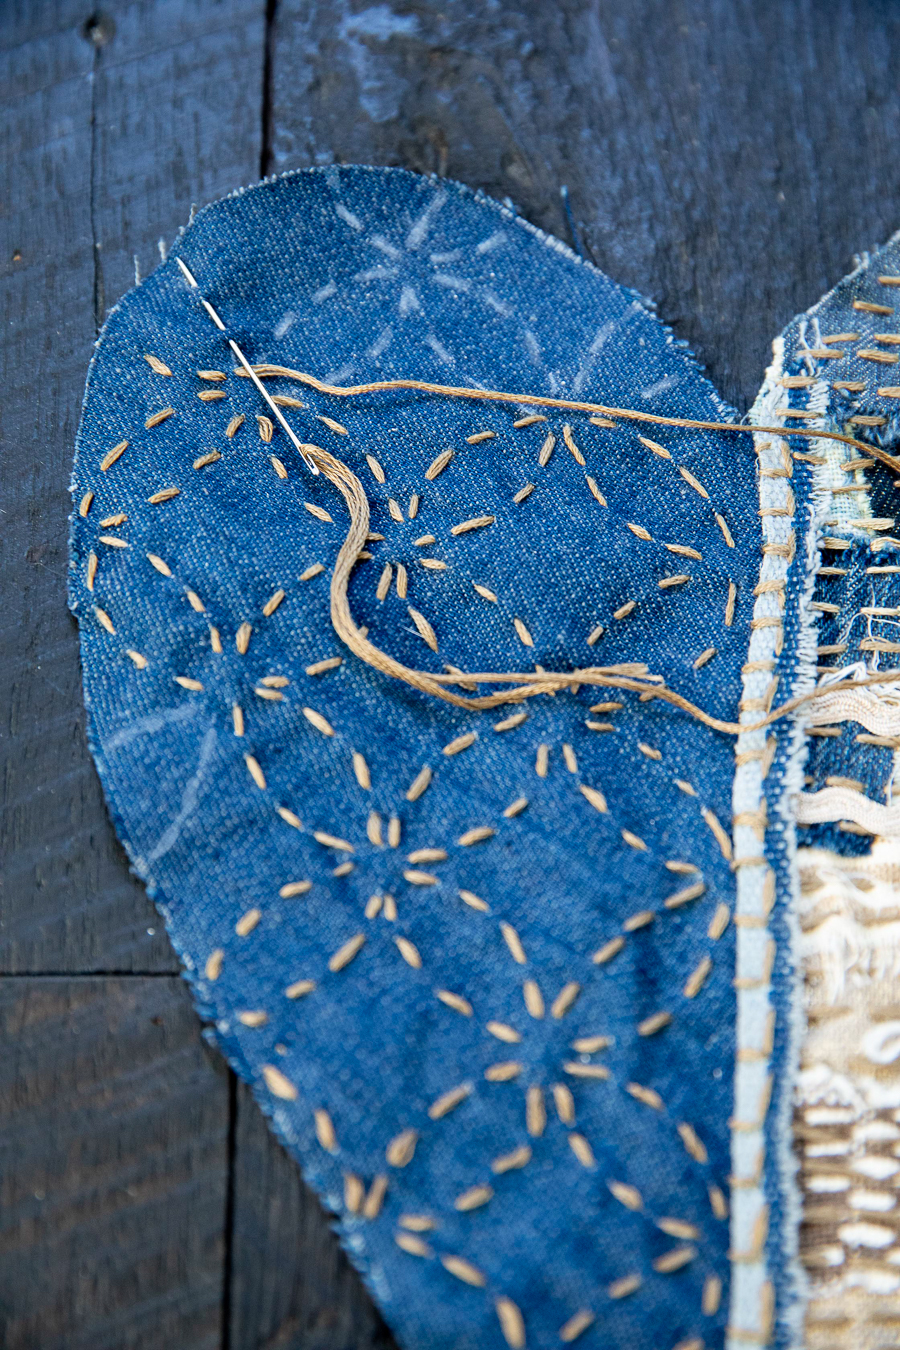
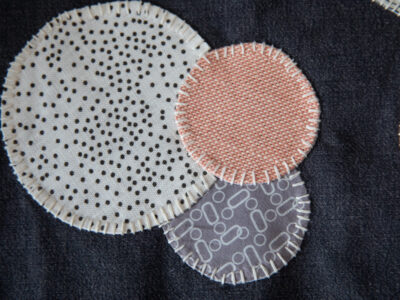
Now the fun part! I decided to add a patchwork of fabrics on the righthand side of the heart and sew a fancy geometric pattern on the left. I like to tear the fabric into rectangles if possible, to get soft tattered edges. Mostly the material’s just too tough, so I end up using scissors. I then hand fray the edges.
Start by placing the fabric pieces on the right side of the heart shape. You want them to overlap by about 1cm. When you’re satisfied with the layout, pin ’em down, trim off the excess, thread your needle, and you’re away!


I’ve used a simple running stitch. I love that slight puckering you get in the fabric.

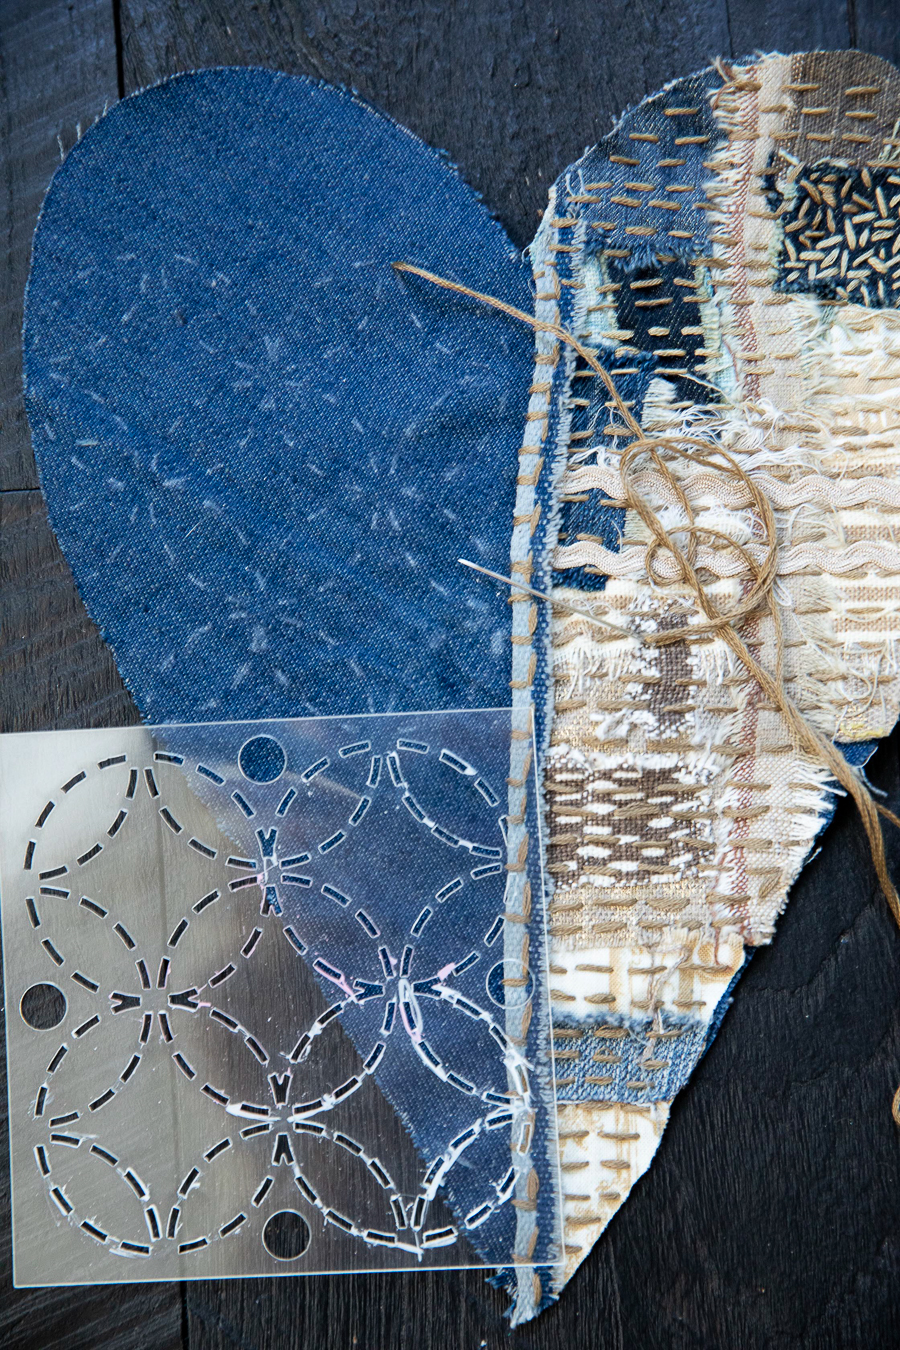
Next, using a sashiko embroidery template, I drew a Shippo-Tsunagi pattern onto the left side of the heart. Now for the stitching!. I love this particular design, and there is an actual method for sewing it. I always set off with good intentions of following this method, but usually, they don’t last long and I’m sewing circles all over the place:-). Oh well, I’m pretty happy with the finished design, and that’s all that matters.
Now you need to make the hanger. I’ve used a 14″ piece of ribbon. Pin it, as shown in the photo, and stitch across the top edge using the sewing machine.

Flip over the heart shape and pin it to the remaining denim so that both right sides are facing each other. Make sure the hanger is nowhere near the edges that are to be sewn up.
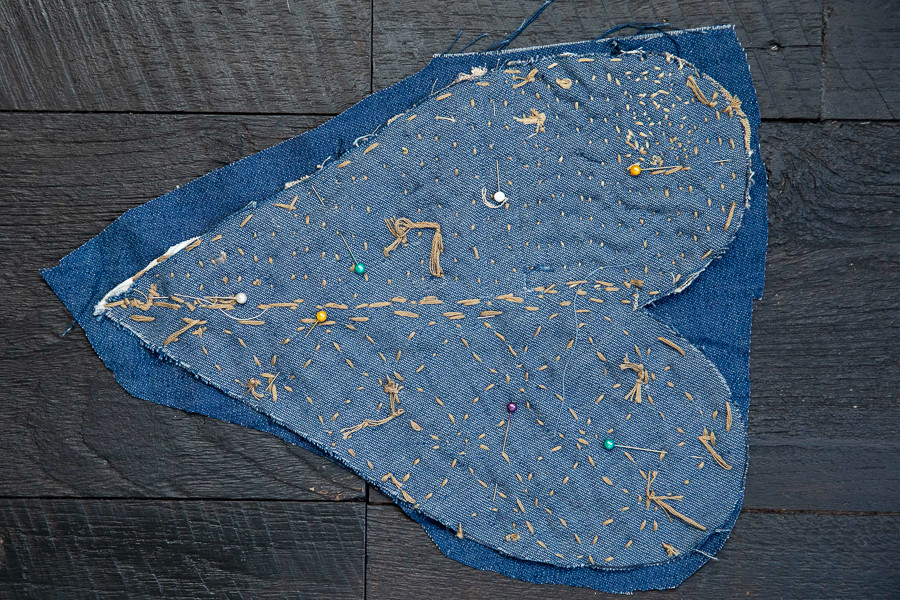
On the sewing machine sew around the perimeter of the heart using a 1/4″ seam allowance until you’re about 2 1/2″ from the start. Be sure to backstitch at the beginning and at the end.
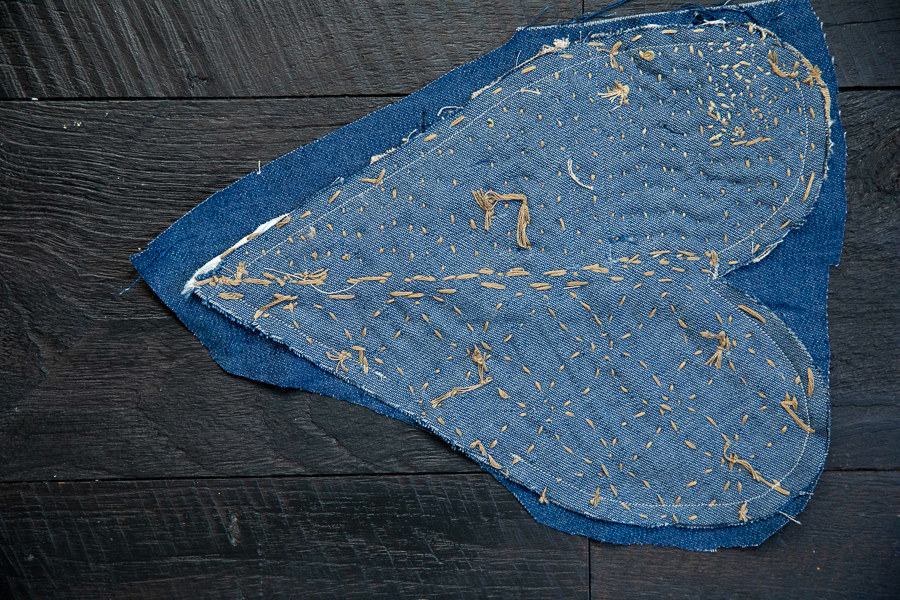
Now you can trim off any excess fabric from the back of the heart.

Make little right-angled snips into the curves at the top, being very careful not to nick the seam. Cut off the point of the heart, again, be really careful you don’t cut into those stitches!
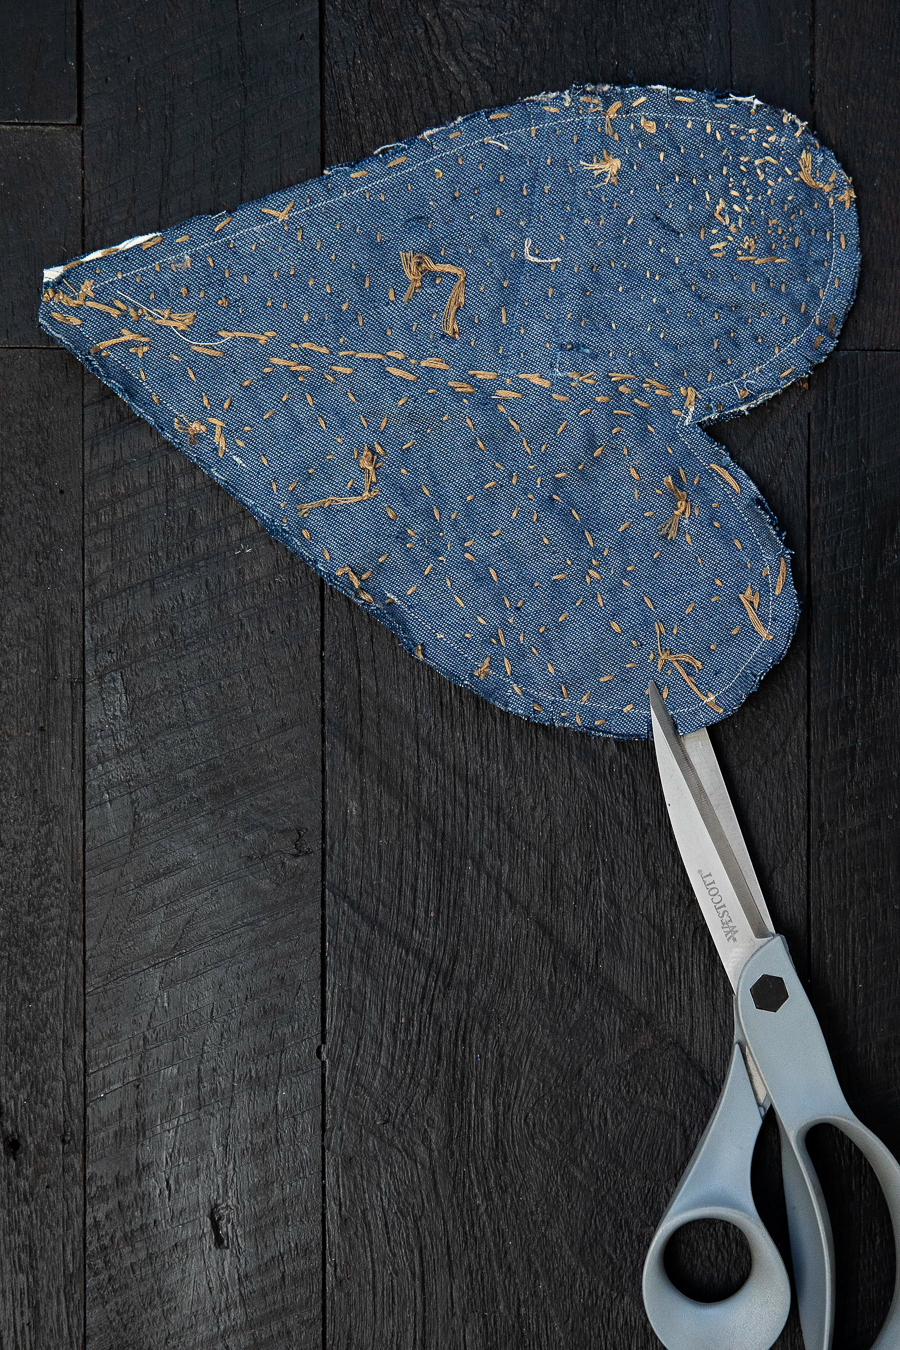
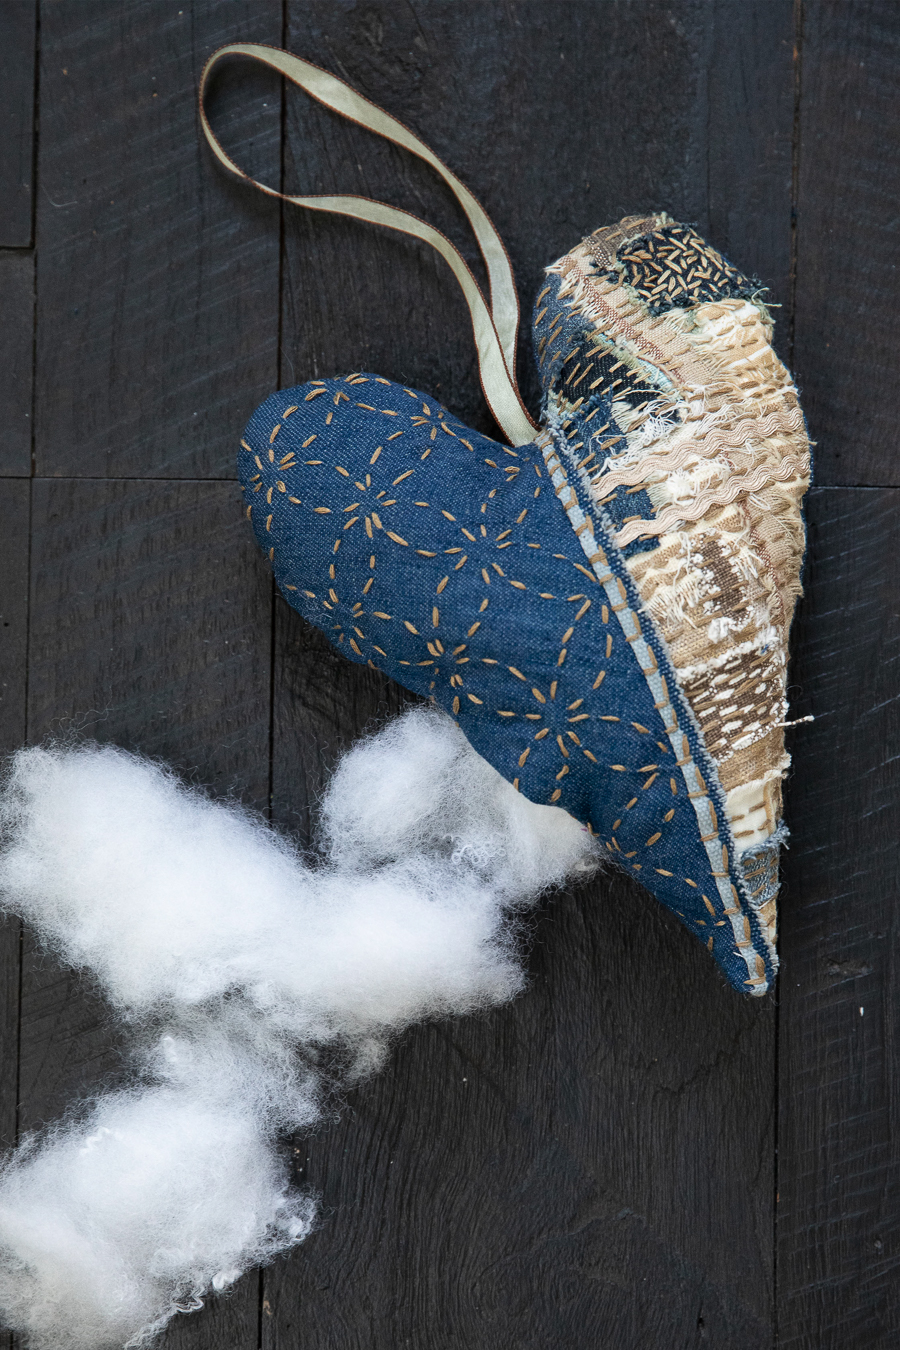
Turn the heart right-side-out and gently push and manipulate (I use a large artist’s paintbrush) to form the perfect shape.
Next up, stuffing! Gently push the fiberfill into all the nooks and crannies, making the ornament as chubby as you want.
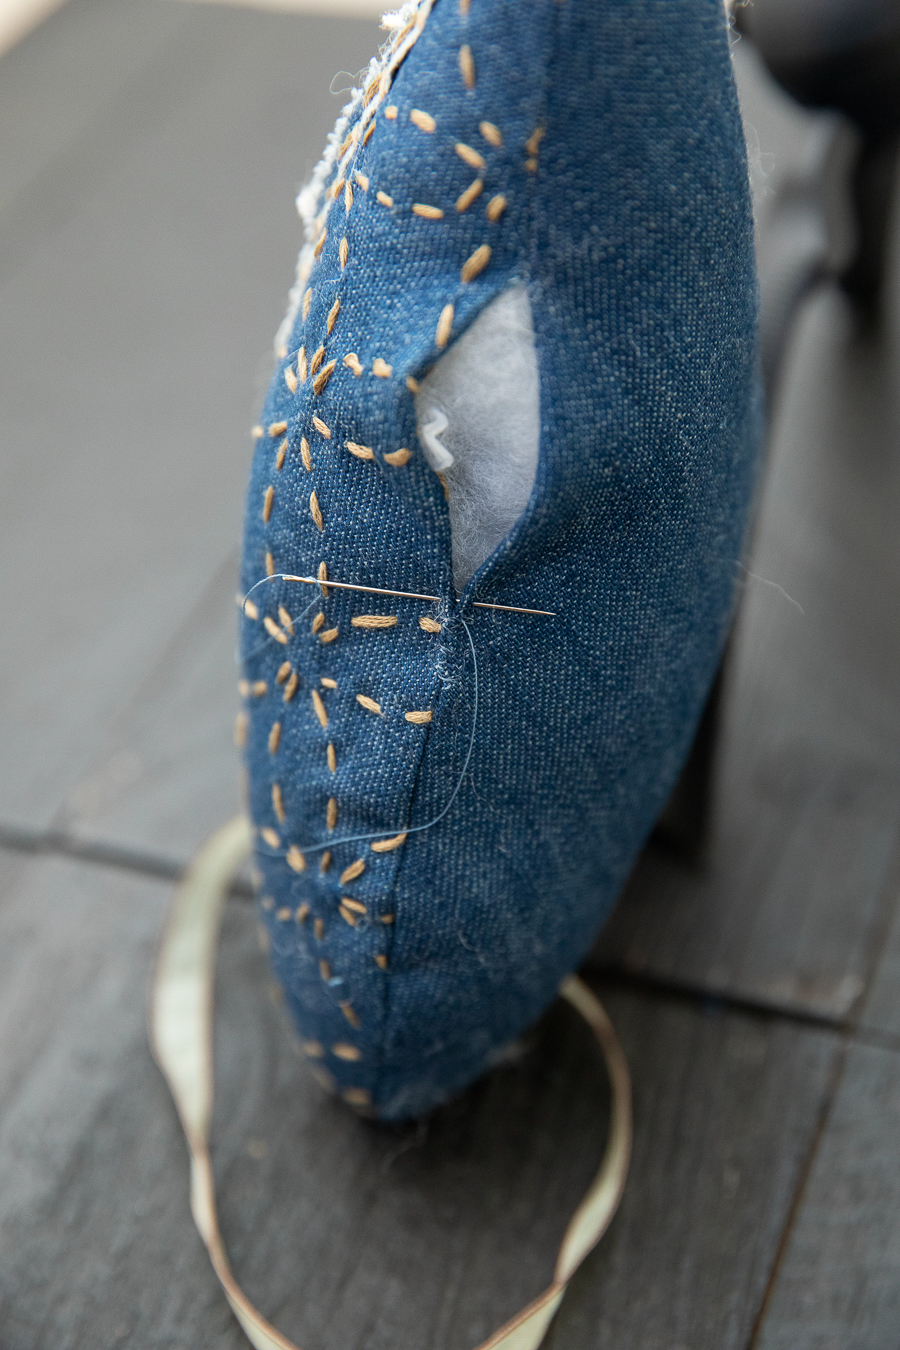
Once you’re all stuffed you need to stitch up the opening by hand using a ladder stitch and denim-blue thread.
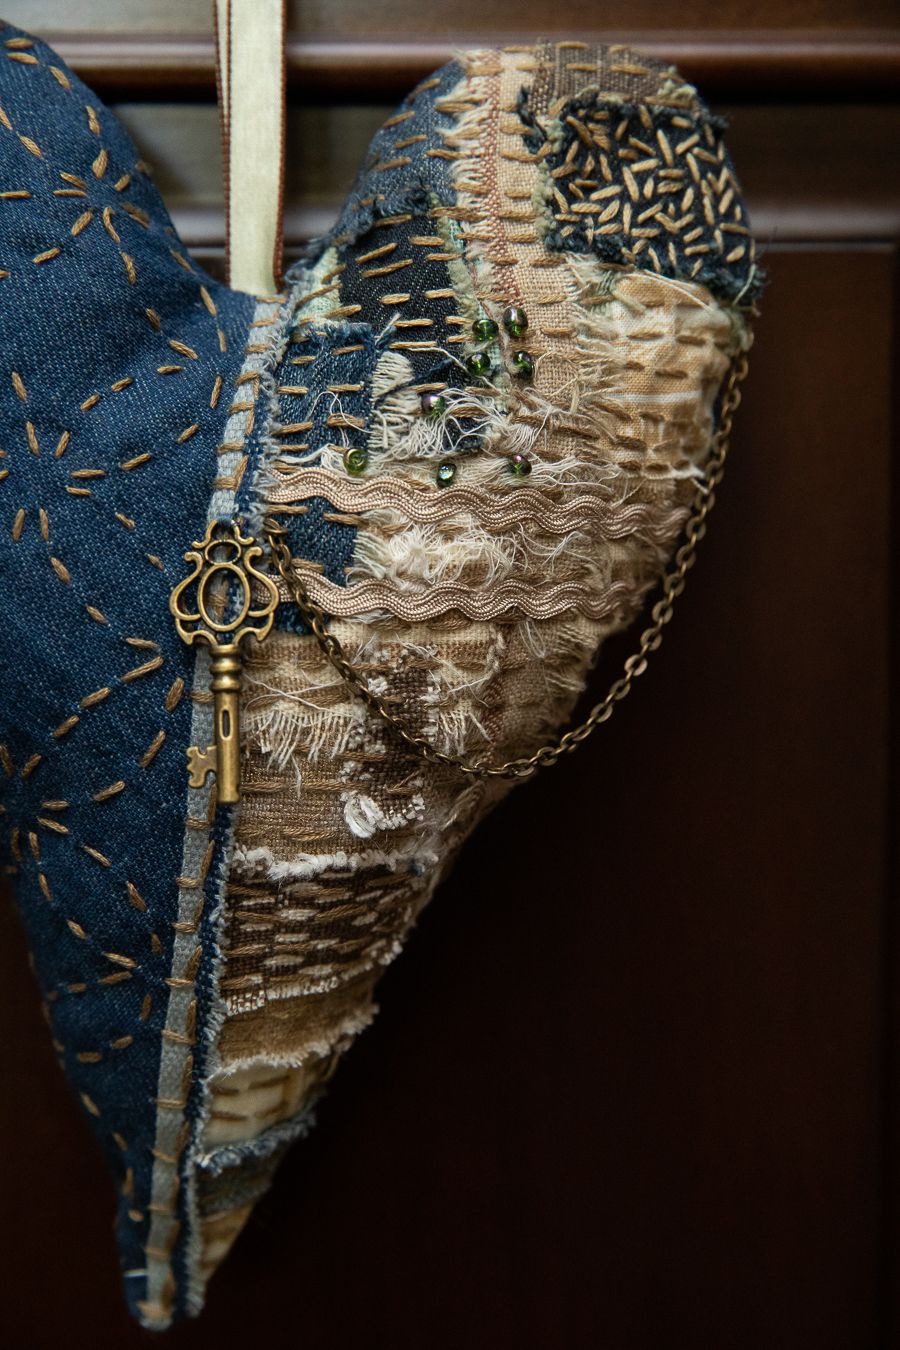
The final step is to add a few embellishments. I stitched on a sprinkling of tiny glass beads, a length of antique-bronze rolo chain, and a little metal key.
Love it!! Now it’s time to step back and admire your handiwork:-)

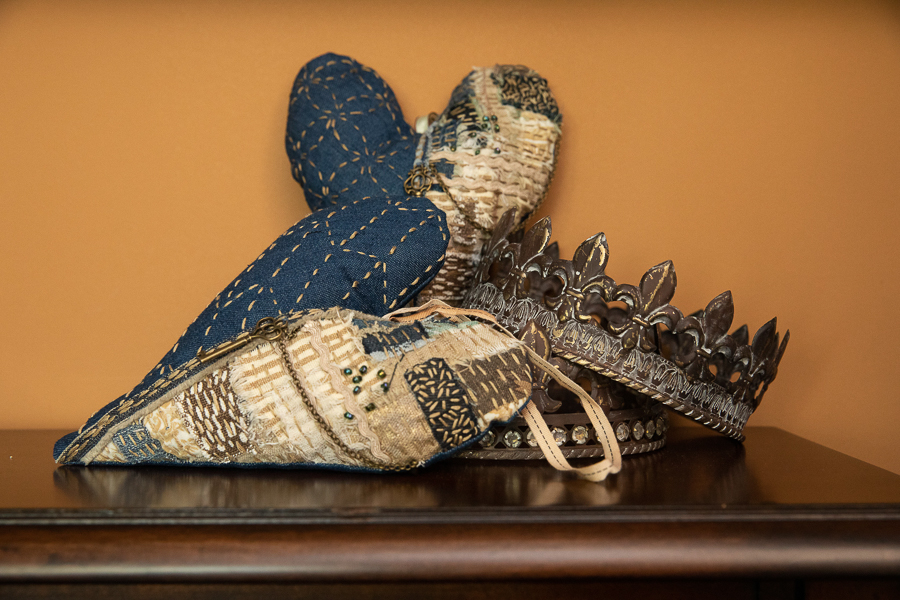
This is the chain and key I used
Happy stitching!
2 comments for “How to make a boro, slow stitched, primitive-style heart ornament”